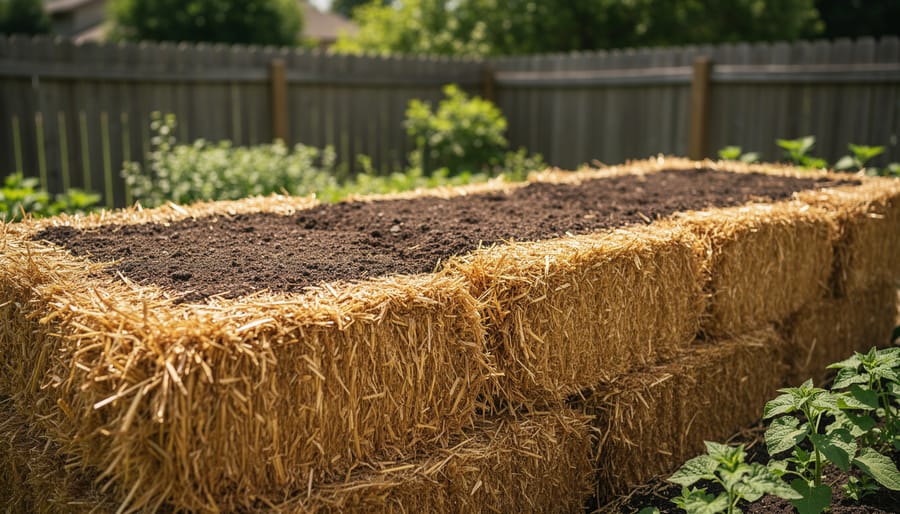
I’ll admit I was sceptical the first time I heard about straw bale gardening. Growing vegetables in what amounts to a slowly decomposing block of straw? It sounded like something dreamed up by someone who’d run out of proper soil. But after three seasons of watching courgettes explode from golden bales in my own garden, I’m a convert. Here’s what it actually is: you position straw bales where you want to grow, condition them with nitrogen and water over roughly two weeks to kickstart decomposition, then plant directly into the softened straw. That’s it. Position, condition, plant.
The method works because the conditioning process transforms each bale into a self-contained growing medium that holds moisture beautifully, warms up faster than traditional beds, and provides excellent drainage. It suits gardeners with terrible soil, bad backs or tiny concrete yards. The technique has seen a surge in interest across the UK over the past couple of years, particularly among gardeners dealing with compacted clay or limited space.
What surprised me most wasn’t just how well plants grew, but how simple the whole process proved to be once I understood the conditioning stage. That fortnight of preparation is absolutely crucial, but it’s hardly labour-intensive.
Why Straw Bale Gardening Works
I’ll be honest, when I first watched a neighbour stack six straw bales along her sunny fence line and start watering them like mad, I thought she’d lost the plot. Three weeks later, she was planting tomatoes, courgettes and basil directly into those bales, and by midsummer her ‘instant garden’ was thriving. That’s when I understood the quiet genius of this method.
The magic happens during those 12 to 14 days of conditioning, when you’re essentially composting the straw in place. As you add nitrogen fertilizer and water, microbes colonize the tightly compressed straw and begin breaking it down. The bale heats up, sometimes reaching 60°C internally, then gradually transforms into a spongy, nutrient-rich growing medium. You’re creating your own raised bed and soil amendment simultaneously, without lifting a spade or mixing compost. It’s gardening alchemy at its simplest.
What makes this particularly clever is the height. Those bales sit about 45cm off the ground, bringing your plants up to a far more comfortable working level. I’ve seen older gardeners with dodgy knees embrace this method with genuine relief, no more kneeling or back-bending required. For renters or anyone with contaminated soil, concrete yards, or heavy clay that would take years to improve, bales offer an immediate solution. You’re simply bypassing the ground altogether.
The raised position also means superb drainage. Excess water runs straight through, preventing the waterlogging that plagues many UK gardens during our famously soggy springs. Yet the straw retains enough moisture to keep roots happy between waterings. As the season progresses and the straw continues decomposing, it releases a steady trickle of nutrients, a slow-release feeding system built right into your growing medium. By autumn, those once-solid bales have collapsed into beautiful mulch you can spread around perennials or add to your compost heap. Nothing wasted, everything cycling back into the garden. That’s holistic gardening without the sermon.
What You’ll Need to Get Started
The beauty of straw bale gardening lies in its simplicity. You need just three core ingredients to get started, and chances are you already have access to at least one of them. I’ve helped several friends set up their first bale gardens, and the materials list never fails to surprise them with how straightforward it is.
Here’s what you’ll actually need:
- Straw bales, tightly compressed rectangular bales, not loose straw or hay bales
- Nitrogen fertilizer, either organic options like blood meal and bone meal, or synthetic lawn fertilizer
- Water source, reliable access for daily watering during the conditioning phase and ongoing growing season
- Optional: compost and well-rotted manure to supplement or replace synthetic fertilizer during conditioning
Let’s talk about sourcing quality straw bales first, because this is where I see most beginners stumble. You want wheat, barley, or oat straw that’s been tightly compressed into standard rectangular bales. In the UK, farm suppliers and agricultural merchants are your best bet, though some larger garden centres now stock them during spring. A single bale typically costs between £3 and £6 depending on your region and whether you’re buying in quantity.
The critical distinction is straw versus hay. Straw is the dried stalks left after grain harvest, it’s essentially hollow tubes that will break down into a growing medium. Hay is dried grass cut for animal feed, and it’s packed with seeds that will sprout enthusiastically in your garden. I learned this the hard way when a well-meaning farmer sold me “bales” that turned out to be hay. Three weeks later, I had a forest of grass seedlings instead of a vegetable patch.
When you’re inspecting bales, look for tight compression with the twine or wire still firmly in place. Avoid bales that feel loose, smell mouldy, or show signs of water damage. The cut ends should face upward when you position them for planting.
For nitrogen fertilizer, you’ve got choices. The traditional method uses a balanced lawn fertilizer (something like 10-10-10), which works quickly and reliably. If you’re committed to organic growing, blood meal, feather meal, or a concentrated organic vegetable fertilizer will do the job, though the conditioning process may take a few extra days. I’ve had success with both approaches, and honestly, the bales don’t seem to care which route you take.
You’ll need roughly 1.5 to 2 kilograms of fertilizer per bale for the full conditioning period. Many gardeners also incorporate a few shovelfuls of finished compost or well-rotted manure directly into the planting pockets, which gives transplants an extra boost and adds beneficial microbes to kick-start decomposition.
Important Considerations Before You Begin
Before I discovered straw bale gardening, I thought it sounded brilliantly simple. Then I tried moving a bale three days into conditioning and nearly threw out my back. That humbling moment taught me what the method guides politely mention but don’t emphasize enough: these things become surprisingly heavy and unwieldy once you start the process.
A dry straw bale weighs around 20 kilograms, manageable for most gardeners. Once saturated and conditioned, that same bale can weigh 50 kilograms or more. If you’re setting up multiple bales, think carefully about placement before you begin. Choose a spot that gets good sun exposure for the crops you’re planning, has reasonable drainage underneath (standing water will rot the base), and won’t trap moisture against wooden fences or sheds. The breakdown process creates warmth and dampness, which wooden structures really don’t appreciate.
You also need realistic expectations about the lifespan and mess factor. These bales are effectively single-season: they’ll give you one growing period before breaking down into a rather untidy pile of composted straw. I’ve watched mine gradually slump and darken throughout summer, shedding loose straw around the base and looking progressively more disheveled. It’s not a tidy garden bed. By autumn, what started as neat rectangular blocks had collapsed into something resembling shaggy brown cushions.
The transformation is part of the charm for some gardeners and a dealbreaker for others. Know which camp you’re in before you commit.
Step-by-Step: Setting Up Your Straw Bale Garden
Phase 1: Position Your Bales
Before you condition a single bale or scatter your first handful of fertilizer, take time to get the positioning right. I learned this lesson the hard way when I enthusiastically set up three bales on my patio, only to realize they were blocking the garden gate. Once you start watering them, these things become immovable objects.
First, find a spot with at least six hours of direct sunlight daily. I position mine in the sunniest patch I can find, the same location I’d choose for my raised beds guide. For tomatoes, peppers, or cucumbers, aim for the south-facing side of your garden. Leafy greens and herbs tolerate partial shade, giving you more flexibility.
Level ground matters more than you might think. A wonky bale will shed water unevenly and might topple once the straw breaks down. I use a spirit level or simply eyeball it, checking from multiple angles.
Water access is crucial. You’ll be soaking these bales daily during conditioning, then watering established plants regularly through summer. Position them within comfortable hose reach or near an outdoor tap.
Now for orientation: lay each bale with the cut ends facing up and the twine running horizontally around the sides. Those cut straws create natural channels for roots to penetrate. I arrange multiple bales in rows with the sides touching, creating a unified growing bed. For a single bale, just plop it down cut-side-up and you’re ready for phase two.
Phase 2: Condition the Straw
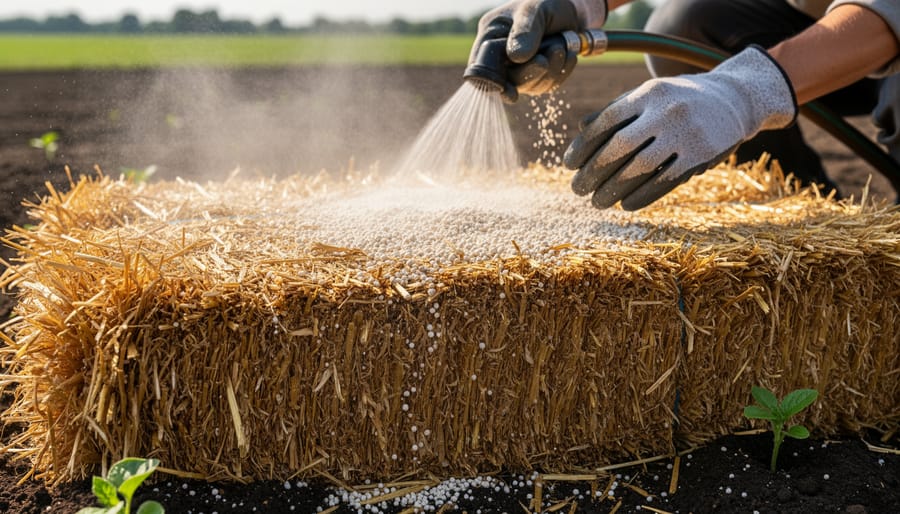
Conditioning is where the magic happens, and I’ll admit I found this phase surprisingly compelling to watch unfold. You’re essentially composting in place, using nitrogen and water to kickstart the decomposition that transforms tightly compressed straw into a spongy, plant-ready growing medium. The process takes patience, plan for 14 to 21 days as a starting guide, but it’s not complicated, and the daily routine becomes rather meditative once you settle into it.
The method I use follows a tried-and-tested schedule that balances nitrogen application with thorough watering. You’ll need your chosen nitrogen fertilizer close at hand, along with reliable water access, because consistency matters more than perfection here.
- Days 1-3: Sprinkle roughly three cups of nitrogen fertilizer evenly across the top of each bale, then water thoroughly until the bale is saturated and water runs freely from the bottom. You’re soaking the entire structure, not just dampening the surface.
- Days 4-6: Skip the fertilizer. Water the bales thoroughly each day to keep the decomposition active and prevent them drying out mid-process.
- Days 7-9: Apply about 1.5 cups of fertilizer per bale, then water deeply again. By now you should notice the bales feeling warm to the touch, that internal heat tells you the breakdown is working.
- Day 10: Add one cup of fertilizer per bale with a generous watering. The bales will have darkened noticeably and started to settle and soften.
- Days 11-12: Water only, no fertilizer. Keep everything moist as the conditioning completes.
During this fortnight, you’ll witness a genuinely satisfying transformation. The straw shifts from pale gold to a richer, darker tone. The bales compress and settle as the material breaks down. Most striking is the heat, in the first week, a well-conditioned bale can generate enough warmth that you’ll feel it radiating when you place your hand on top. That heat is decomposition in action, the straw converting into the growing medium your plants will thrive in.
If you prefer an organic approach, conditioning with compost and manure works beautifully, though it typically extends the timeline slightly. Spread a thick layer of well-rotted manure and compost across the bale’s surface, water it in thoroughly, and repeat every few days. The principle remains the same, you’re feeding the decomposition process, but the materials break down more gently.
Watch for the bale to cool down and feel spongy rather than rigid when you press into it. That’s your signal that conditioning is complete and planting can begin.
Phase 3: Plant Your Garden
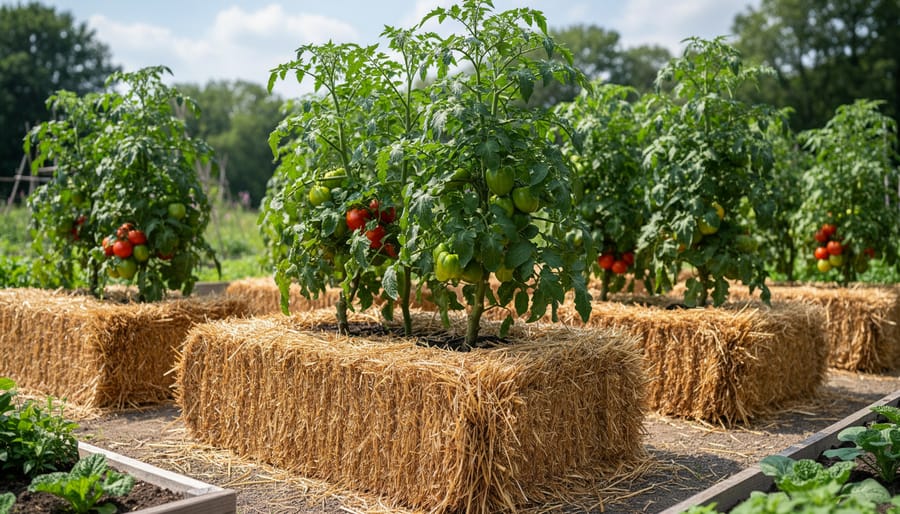
Once your bales have cooled and darkened, it’s time for the most rewarding part. I still remember the thrill of pushing my hands into that soft, warm straw for the first time, knowing I was about to plant in something I’d created rather than dug.
Creating planting pockets is straightforward. For transplants, use your hands or a trowel to pull apart the straw and create a depression about 15cm deep and wide enough to accommodate the root ball. The straw should move easily if it’s properly conditioned. For direct seeding, simply pull back a thin layer of straw, sprinkle seeds, and cover with a couple of centimetres of potting compost. I’ve found transplants establish more reliably than seeds, especially for crops like tomatoes, peppers, and courgettes.
The beauty of straw bales is their versatility. Here’s what thrives in my experience:
- Tomatoes, plant deeply and stake firmly, as bales provide excellent drainage
- Courgettes and squash, love the warmth and space to sprawl
- Peppers and aubergines, benefit from the heat retention
- Lettuce and salad leaves, perfect for quick succession plantings
- Herbs like basil and parsley, establish quickly in the loose medium
- Strawberries, my absolute favourite, as they cascade beautifully down the sides
Avoid root vegetables like carrots or parsnips, as they need deeper, finer soil. I once tried potatoes with mixed results, though some gardeners swear by them.
Watering becomes your daily ritual. Bales drain quickly and dry out faster than traditional beds, so check moisture levels every morning during summer. When you water in heat you might need to water twice daily. I use a drip irrigation system now, which saves considerable time.
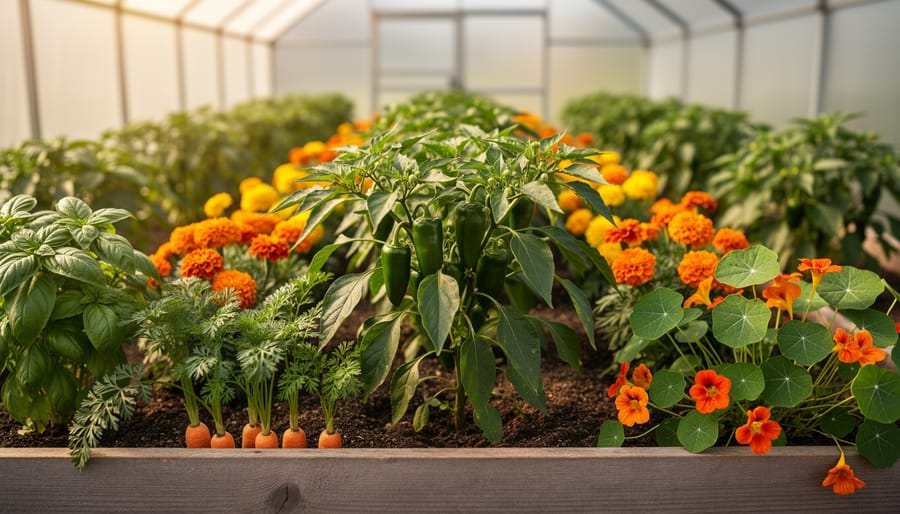
Feed every fortnight with a balanced liquid fertilizer once plants are established. The straw provides structure but limited ongoing nutrients. I’ve had spectacular results with tomatoes by applying weekly feeds once fruit sets. Consider companion planting combinations, too, I tuck marigolds and nasturtiums around my bales, which seems to deter pests while adding colour.
How to Tell If Your Bales Are Ready and What to Expect Next
The best test for readiness is tactile: push your hand deep into the centre of the bale. You’re checking for warmth without excessive heat. A pleasantly warm bale (think comfortably warm bath water) signals active decomposition; if it’s still hot enough to make you snatch your hand back, give it a few more days. Cold bales haven’t started breaking down yet, which means your nitrogen application or watering routine needs adjustment.
Visually, you’ll notice the bale has darkened from golden straw to something closer to weathered wood, with the twine cutting deeper into the settling mass. It should’ve dropped by several inches and feel noticeably heavier from absorbed moisture. Squeeze the straw: properly conditioned material gives way slightly and feels softer, almost spongy, rather than rigid and scratchy. I learned this the hard way one May when I jumped the gun, planted tomatoes into a bale that looked ready but was still burning hot inside, and watched them wilt within two days.
If your bales aren’t heating up after a week, you’ve likely underfed them. Double your nitrogen dose for three consecutive days and drench thoroughly. Conversely, a bale that stays scalding hot for more than sixteen days might be overloaded; just keep watering daily and let time do the work. Once plants are established, water daily during dry spells (those bales drain fast) and feed every couple of weeks with liquid fertilizer, much like square foot planting requires regular attention to confined spaces.
Following planting by season guidelines, your bales will serve you through one growing season before collapsing into a magnificent, dark, composted mass by autumn. That spent straw makes gorgeous mulch for flower beds or gets forked straight into your compost heap, closing the loop beautifully.
Common Questions About Straw Bale Gardening
After weeks of tending my bales and chatting with fellow gardeners at allotment open days, I’ve heard the same questions crop up repeatedly. Some folks are curious, others skeptical, but everyone wants practical answers before committing to their first straw bale garden.
The Straw Versus Hay Confusion
This one comes up constantly. Straw is the hollow, golden stems left after grain harvest, wheat, barley, or oats. It’s essentially empty stalks with minimal nutrients and very few seeds. Hay, on the other hand, is cut grass and legumes grown specifically for animal feed, packed with seeds that will gleefully sprout throughout your garden. I learned this distinction the hard way in my first year when a well-meaning neighbor offered me “spare bales” that turned out to be hay. Within a week, I had a miniature meadow instead of a vegetable patch. Always ask your supplier specifically for straw bales, and check that the stems look hollow and golden rather than green and leafy.
How long do straw bales last as a growing medium?
One growing season is realistic. By autumn, your bales will have broken down significantly and won’t hold together for another year of planting.
Can I condition bales organically without synthetic fertilizer?
Absolutely. Use well-rotted manure, garden compost, or blood and bone meal to provide the nitrogen needed for decomposition. The process takes a bit longer but works beautifully.
Does straw bale gardening work in the UK climate?
Yes, it thrives here. Our regular rainfall helps with the constant moisture requirement, though you’ll still need to water during dry spells.
What about slugs and other pests?
Slugs can climb into bales, but the raised height and loose structure actually make them easier to spot and remove than in traditional beds.
Is it more expensive than regular raised beds?
Initially cheaper, a bale costs around £4-6 versus materials for a wooden bed. However, you’re replacing bales annually rather than building once.
What Happens to Spent Bales
The beauty of this method is that nothing goes to waste. By season’s end, your bales will have decomposed into gorgeous, fluffy compost material. I spread mine around fruit trees and shrubs as mulch, where it continues breaking down and feeding the soil. Some gardeners dig it directly into new beds or add it to compost heaps. A local allotment holder I know uses spent bales to build up no-dig beds each autumn, creating layers of organic matter that settle over winter. The transformation from sturdy bale to rich growing medium never stops being satisfying to witness.
I’ll admit straw bale gardening isn’t for everyone. If you’ve got perfect soil, established raised beds, and a system that works brilliantly, there’s no need to change. But if you’re staring at hard clay, struggling with back pain when you bend to weed, or simply curious about a different way to grow food, this method deserves a shot. I love that it bypasses so many traditional barriers, no digging, no expensive structures, just straw, nitrogen, water, and patience during those conditioning weeks.
What keeps me coming back to new techniques like this isn’t just the harvest, though that’s satisfying enough. It’s the mental shift that happens when you step outside your usual routine and discover something works in a way you hadn’t imagined. Straw bale gardening forces you to think differently about what a garden bed actually is, and that kind of creative problem-solving spills over into other areas of your life.
I’d genuinely love to hear how you get on if you try this. What worked? What surprised you? Did your bales heat up as expected, or did you hit a snag with the conditioning? The gardening community thrives when we share these real experiences, the victories and the head-scratching moments alike. Drop your questions or your straw bale stories in the comments below, and let’s keep learning from each other. That’s what Great Gardens UK is all about.