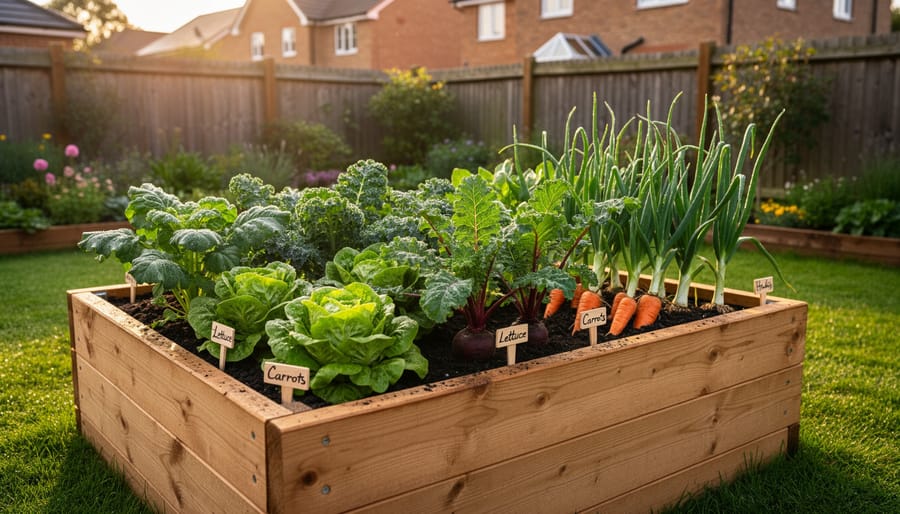
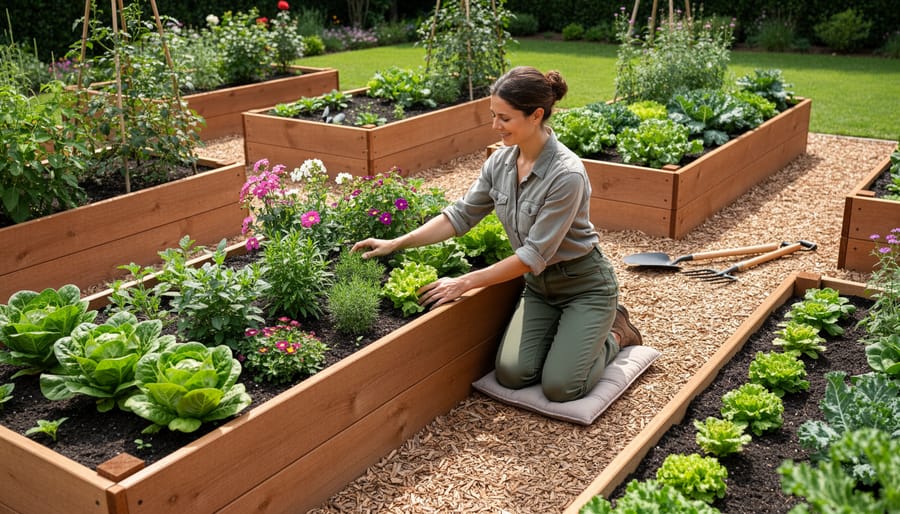
I’ll never forget the summer I finally gave up on my clay-heavy garden bed and built my first raised bed against the back fence. Within three months, I was harvesting more tomatoes than the previous three years combined. That single wooden frame, filled with proper soil, changed everything I thought I knew about what was possible in my small London garden.
Raised beds have quietly transformed British gardens over the past decade, and for good reason. They solve problems most of us face: poor soil, drainage issues, back pain from bending, and the frustration of plants that simply refuse to thrive. One thing stuck with me: people think raised beds are about the structure, but they’re really about control. You’re creating the exact environment your plants need, rather than fighting against what you’ve been given.
The beauty of raised beds lies in their flexibility. You can position them to catch maximum sunlight, fill them with soil that suits your specific crops, and adapt them as your needs change. I’ve seen them work brilliantly in tiny courtyard gardens and sprawling allotments alike. They’re particularly valuable here in the UK, where heavy clay soil and unpredictable drainage challenge even experienced gardeners.
This guide will walk you through everything you need to know, from choosing materials that’ll last through our damp winters to determining the right dimensions for your space and abilities. Whether you’re dealing with contaminated soil, mobility issues, or simply want better yields, raised beds offer a practical solution that delivers results from the first season.
My Journey from Flat Ground to Raised Beds (And What I Wish I’d Known)
I’ll be honest: my first raised bed was a disaster wrapped in good intentions. Spring 2019, I’d watched one too many YouTube videos and decided four feet by eight feet of reclaimed pallet wood would transform my waterlogged back garden into a productive paradise. I didn’t consider that pallets aren’t exactly built for prolonged contact with wet British soil, nor did I think about what I’d actually fill the thing with once I’d hammered it together on a drizzly March afternoon.
Three months in, the wood was already soft to the touch. By autumn, one corner had completely collapsed under the weight of sodden compost, spilling half-rotted tomato plants across the lawn. I’d filled it with whatever was cheap at the garden centre, a decision that resulted in compacted, airless soil that my courgettes resented deeply. Looking back, I’d skipped every step that actually mattered: choosing materials that could survive our damp climate, thinking through drainage, understanding what goes beneath the topsoil.
What changed everything was accepting that this wasn’t just about containing soil in a box. When I rebuilt the following spring with proper cedar planks, I thought about longevity rather than just getting something in the ground fast. I planned the height so I wouldn’t wreck my back leaning over, positioned it where water wouldn’t pool underneath, and spent actual time layering materials inside rather than dumping in a single type of compost.
The difference wasn’t subtle. That second bed produced more in its first season than my original ground-level plot had managed in three years. My carrots grew straight instead of forked and stunted. The lettuces didn’t bolt the moment we hit a warm week. I could actually reach the centre without trampling half the plants or doing an awkward lean that left me aching for days.
What I wish someone had told me: start smaller than you think you need, invest in materials that won’t rot within two seasons, and accept that what goes inside the frame matters far more than the frame itself. Those pallet-wood mistakes taught me more than any perfectly executed first attempt would have, but I could’ve saved myself a fair bit of frustration and one ruined batch of heritage tomatoes.
The Real Benefits Nobody Talks About
Last autumn, I watched my neighbour spend three hours on her knees weeding between vegetable rows. She’s 68, and by the time she finished, she could barely stand upright. Two weeks later, she installed raised beds. Now she gardens from a folding stool, and I haven’t heard her complain about her back since.
That’s the benefit everyone glosses over in the glossy gardening magazines: raised beds aren’t just about better drainage or warmer soil. They’re about continuing to garden when your knees stop cooperating.
My own beds sit at 60 centimetres high, which means I can perch on the edge and plant without bending. When my father visits, he actually joins me in the garden now instead of watching from the patio. He spent forty years growing prize dahlias before arthritis made ground-level gardening impossible. Raised beds gave him that back.
There’s something else I’ve noticed that sounds too soft to be practical, but it’s real: the mental clarity of a contained space. When I look at my traditional borders, I see endless possibilities and, honestly, feel a bit overwhelmed. But a raised bed measuring four feet by eight feet? That’s manageable. That’s a project I can finish. I’ve talked to enough gardeners struggling with anxiety to know I’m not alone in finding that psychological containment genuinely helpful. The connection between weather and your health is well documented, but what fewer people discuss is how a defined growing space reduces decision fatigue and creates achievable daily goals.
For those of us dealing with British clay soil, raised beds solve problems that no amount of digging can fix. Our cottage sits on heavy Weald clay that stays waterlogged from October through March. I tried improving it for three years, following the RHS guidance for clay soils religiously, working in compost and grit until my shoulders ached. The ground-level beds still turned to porridge every winter.
The raised beds drain within hours of heavy rain. Roots don’t sit in cold, anaerobic muck. I’m harvesting carrots in November now, something I’d given up on entirely when planting at ground level. That single advantage has transformed what I can grow in a climate that throws 800 millimetres of rain at us most years.
Nobody mentions these things in the “Top 10 Benefits” lists, but they’re the reasons raised beds have become permanent fixtures rather than experiments in my garden.
Choosing Your Materials: What Works Best for British Weather
The Wood That’s Worth the Investment
I’ll confess: I built my first raised bed with whatever scrap timber was lying in the garage. Pine boards from an old fence panel, pressure-treated offcuts my neighbour was throwing away. I was trying to save money, and honestly, I thought wood was wood. Two years later, those beds were sagging, the pine was flaking apart, and I was rebuilding everything from scratch.
That’s when I finally invested in cedar. The upfront cost stung a bit, but I haven’t touched those beds since 2020, and they still look like I built them last summer. The difference comes down to natural oils. Cedar contains thujaplicins, compounds that literally repel rot and deter insects without any chemical treatment. Redwood works the same way with tannins. These woods don’t just tolerate our soggy British autumns, they shrug them off.
The research backs this up. Studies show that cedar and redwood last at least 10 years in direct soil contact, often longer. I’ve seen 15-year-old cedar beds that still have solid corners. Hemlock’s another option if you find it, though it’s less common here and slightly less durable.
Yes, cedar costs more than pine or treated timber. But when you group pots together or calculate replacement cycles, that premium disappears fast. I spent £90 on cedar for two 2.4-metre beds in 2020. My pine attempt cost £35 but lasted two seasons. Do that maths over a decade, and rot-resistant wood is the bargain.
Budget-Friendly Options That Actually Last
Last autumn, I watched a neighbour spend over £300 on a single raised bed kit. Three months later, I’d built three beds for less than half that price, and they’re holding up beautifully through our relentless British rain.
The secret isn’t cutting corners. It’s knowing where to spend and where to save. Cedar remains my top recommendation even on a tight budget because wood is genuinely one of the least expensive raised bed materials, and quality cedar boards cost far less than most people think. I’ve seen DIY cedar beds built for under $30 (roughly £23), proving you don’t need premium kits to get premium results.
Here’s what actually works: buy rough-sawn cedar or hemlock direct from a timber yard rather than pre-cut boards from garden centres. The savings are significant. I paid £18 for enough cedar to build a 4×4 foot bed, versus £45 for the same amount at a retail outlet. Yes, you’ll need to cut it yourself, but a handsaw and an hour of your time saves real money.
Avoid treated pine at all costs. It might seem cheaper initially, but replacing rotted beds every three years costs more than building with rot-resistant wood once. And those metal corner brackets marketed for raised beds? Standard galvanized screws work just as well for a fraction of the price. I’ve used three-inch decking screws on every bed, and they’ve never failed.
The real budget hack is starting small. One well-built 4×4 bed this year beats three poorly-constructed beds that need replacing next season.
Getting the Dimensions Right: Size Actually Matters
I learned the hard way that 120cm-wide beds looked impressive until I tried to weed the middle without toppling face-first into my beetroot. Standing on one side, I could comfortably reach about 60cm before my lower back started protesting, which is why the often-recommended 48-inch (roughly 122cm) width only works if you can access both sides. For beds against a wall or fence, keep them 60cm wide maximum, you’ll thank yourself when you’re not performing acrobatics to harvest tomatoes in August.
Height matters more than most beginners realize, and it’s not one-size-fits-all. I started with 30cm-deep beds because that’s what the tutorial suggested, but my carrots had different ideas, they needed at least 45cm to grow straight rather than forked and stubby. Salad greens and herbs thrive in shallower 20-25cm beds, while potatoes and parsnips want 60cm or more. If you’re gardening from a wheelchair or find bending difficult, raising beds to 75-90cm brings the soil to a comfortable working height without creating a perfect soil circle you can’t maintain.
Length is your most flexible dimension. My beds range from 120cm for tucked-away herb gardens to 4 metres for my main vegetable bed, and I’ve found that keeping them modular (multiples of 60cm or 120cm) makes crop rotation planning infinitely easier. Just remember that whatever dimensions you choose, you’ll be filling them with soil, a 120cm x 240cm x 45cm bed holds nearly 1.3 cubic metres of growing medium, which weighs substantially more than you’d expect when delivered.
Building Your First Raised Bed: What to Know Before You Build
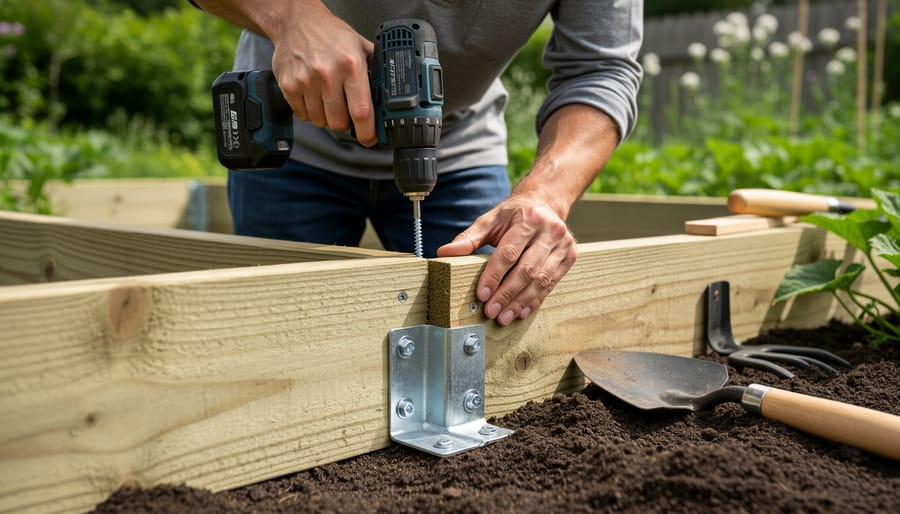
The biggest mistake people make is assuming they need a full workshop and carpentry skills. A cordless drill and a handsaw are enough to build a first bed.
Start with a basic rectangle, four boards and four corner posts. Forget fancy joinery for your first attempt. Screws straight through the boards into the posts work brilliantly, and you can always upgrade your technique later. The tool list fits in a single carrier bag: drill, screws rated for outdoor use, saw, tape measure, carpenter’s square, and gloves.
Timber choice matters too. If you want a bed still standing in five years, cedar is the one to pay for.
Common pitfalls include cutting boards to different lengths, forgetting that soil expands when wet and pushes the sides out, and building directly on grass without any base preparation. Level matters more than people think. Even a slight tilt means one end stays waterlogged while the other drains too fast.
My advice for nervous beginners? Build small. A metre by two metres, about a foot high. You’ll finish it in an afternoon, feel accomplished, and learn everything you need before tackling something bigger. Then next spring, build another.
What to Actually Put Inside (Beyond Just Soil)
I filled my first raised bed with what I thought was “good soil” from a garden centre, then watched my tomatoes sulk and my lettuces bolt within weeks. Turns out, what goes inside matters just as much as the frame itself.
The mistake most beginners make is treating a raised bed like an empty box that needs filling with one thing. I’ve learned it’s actually a layered system that works with your plants rather than against them.
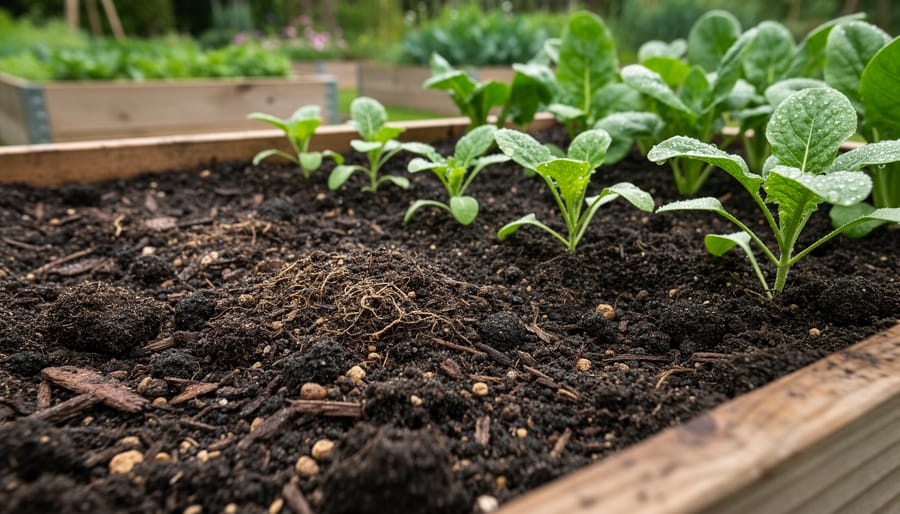
Start at the bottom with something that aids drainage without creating a barrier. I use a layer of cardboard directly on the grass or soil, which suppresses weeds while breaking down over the season. On top of that, I add about ten centimetres of coarse material: twigs, small prunings, or wood chips work brilliantly. This creates air pockets, prevents waterlogging in our wet winters, and gradually decomposes to feed the soil structure. Some gardeners skip this layer in shallow beds (anything under 30 centimetres deep), and that’s fine, but in deeper beds it makes a real difference.
For the main fill, I’ve settled on a rough two-thirds quality topsoil to one-third compost mix. The exact ratio shifts depending on what you’re planting. Heavy feeders like courgettes and tomatoes appreciate a richer blend with more compost, while root vegetables prefer a lighter, sandier mix that won’t compact. I learned this the hard way after growing stubby, forked carrots in overly rich soil.
The real secret isn’t the initial fill, though. It’s what you do afterwards. Each season, I top up with a few centimetres of fresh compost, which settles and feeds the existing soil. Between crops, I’ll sow a quick round of understanding green manure like mustard or clover, which I dig in before it flowers. This keeps the bed alive and productive rather than depleted.
I also rotate what goes where each year, following basic companion planting principles. That rotation naturally builds different soil qualities in different beds, which sounds complicated but actually simplifies planning once you get the rhythm.
Your local soil type matters, too. My heavy clay means I lean towards lighter, sandier mixes, while a friend on sandy Berkshire soil adds more organic matter to hold moisture. There’s no universal recipe, just principles you adjust to your patch.
When Raised Beds Aren’t the Answer
I’ll be honest with you: raised beds aren’t a magic solution for every garden or gardener. After years of building and filling them, I’ve met plenty of people who’ve invested time and money into raised beds only to realize traditional ground-level beds would have served them better.
If you’re growing deep-rooted crops like carrots, parsnips, or potatoes in quantity, the maths rarely works in favour of raised beds. You’d need beds at least 45cm deep, which means considerable material costs and vast amounts of quality growing medium to fill them. My neighbour grew champion parsnips in his ordinary vegetable patch for decades without a raised structure in sight, and he’s not wrong for sticking with what works.
Likewise, if you’re gardening on naturally free-draining, fertile loam, you’re already blessed with conditions most of us are trying to recreate inside raised beds. Why add an extra layer of complexity and expense when you can simply work compost into what you’ve got?
Space matters too. In a small urban garden where every inch counts, four raised beds with their thick timber walls might actually reduce your growing area compared to carefully planned traditional beds. And if you’re someone who loves the spontaneity of moving plants around, reconfiguring borders, or experimenting with layout each season, the permanence of raised structures can feel restrictive rather than liberating.
There’s no single right way to grow.
Looking back at my garden now, it feels almost unrecognizable from that patchy lawn I started with. The raised beds have become more than just growing spaces. They’re where I have my morning coffee while checking on seedlings, where I bring visitors first, where I actually enjoy the act of gardening rather than fighting with it. My back doesn’t ache after weeding. My tomatoes don’t sit in puddles. And I’ve learned more about soil in three years of raised bed growing than I did in a decade of struggling with what I had.
If you’re considering making the switch, my advice is simple: start with one bed. Build it yourself or rope in a friend who’s handy. Fill it with whatever budget allows. Plant something you actually want to eat or look at. You’ll make mistakes, I certainly did, but there’s something forgiving about raised beds. They’re contained enough that you can experiment without committing your entire garden to a failed idea.
The most surprising thing has been how they’ve changed my relationship with the growing season itself. I’m out there earlier in spring because the soil warms faster. I’m more adventurous with what I try because I’ve created the conditions plants actually want rather than making do.
I’d love to hear how your own raised bed experiments turn out, whether you’re converting your first corner of lawn or adding to an existing setup. Every garden tells a different story.