Growing your own produce at home takes roughly six months to establish a genuinely productive system, requires about 20 square metres of space minimum, and follows a three-phase approach: planning your rotation, building soil fertility, and establishing succession planting. This isn’t a weekend hobby that yields Instagram-worthy harvests by July. It’s a methodical process of transforming how your family sources food.
I started my own journey three years ago with precisely this mindset. My husband and I were spending nearly £180 monthly on fresh vegetables, and I wanted us to grow at least half of that ourselves. Not as a charming pastime, but as actual food production. The first season was humbling. I planted everything in April, harvested a glut in August, and by October we were back at the supermarket buying courgettes I’d sworn I’d never purchase again.
The breakthrough came when I stopped thinking like a gardener and started thinking like a small-scale farmer. Sarah Raven, whom I interviewed last spring, put it perfectly: “Most families fail at food growing because they treat it like decoration with edible benefits. Flip that. Treat it like a food system that happens to look lovely.”
That shift changed everything. I began focusing on calorie-dense crops rather than novelty varieties. I learned to plant in waves rather than all at once. I accepted that some vegetables, rocket and radishes for instance, need sowing every fortnight if you want a consistent supply rather than a sudden abundance followed by months of nothing.
This guide walks you through establishing that same systematic approach, from selecting the right tools to verifying your soil is actually productive, not just occupied.
What You’ll Need to Get Started
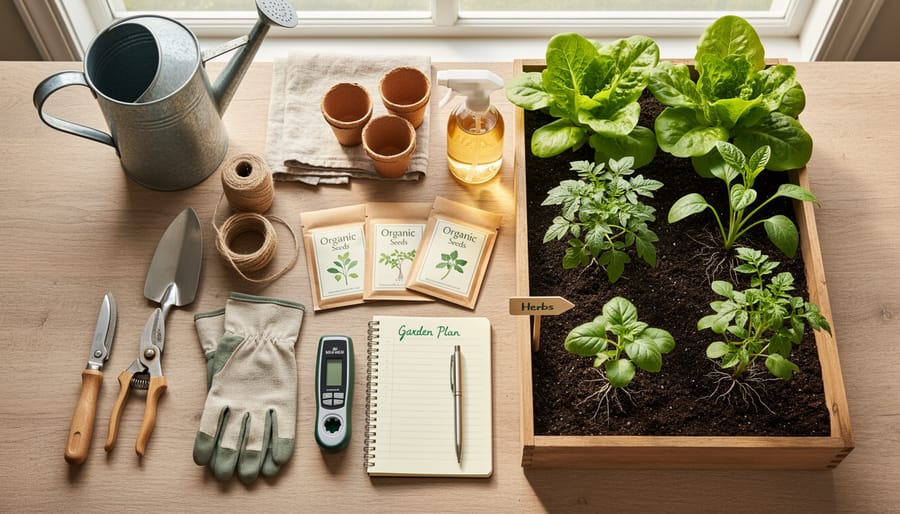
When I first decided to grow food for my family, I stood in the garden shed staring at an inherited collection of rusty tools and wondered what I actually needed versus what the glossy catalogues insisted was essential. The truth? You need less than you think to start, but certain items will make the difference between frustration and success.
I began with six basic tools that still form the backbone of my produce growing today: a digging spade for turning soil and planting, a border fork for lifting crops and breaking up clumps, a Dutch hoe for weeding between rows, a spring-tine rake for preparing seedbeds, a hand trowel for transplanting, and a pair of secateurs that don’t stick. That’s it. The fancy dibbers and specialized gadgets came later, mostly as gifts I rarely use.
Beyond tools, here’s what you’ll genuinely need to establish a sustainable family garden:
- Infrastructure: At least two compost bins (one filling, one breaking down), water collection (butts or tanks fitted to downpipes), and some form of growing beds (raised wooden frames or improved in-ground plots)
- Seeds and plants: Start with reliable varieties suited to UK conditions, buying small quantities of several crops rather than bulk packets of one or two
- Soil amendments: Garden compost or well-rotted manure for initial bed building, plus a bag of general organic fertilizer
- Season extension basics: Horticultural fleece and a few cloches (even cut plastic bottles work initially)
- Knowledge resources: One good UK vegetable growing book and a notebook for tracking what you plant and when
The mistake I made was buying everything at once in a burst of enthusiasm. My advice now? Start with the tools and one or two beds, prove you’ll use them, then add infrastructure as your ambition grows. I interviewed Sarah, who runs a community garden in Bristol, and she emphasized the same point: “People spend hundreds on a fancy greenhouse before they’ve successfully grown a lettuce. Build the habit first, the collection second.”
A water source near your beds isn’t negotiable though. Dragging hoses across lawns gets old fast, and watering is the task that separates successful growers from those who give up by July.
Planning Your Family Sustainability Garden
Calculating What Your Family Actually Eats
I spent our first year growing mountains of courgettes nobody wanted while buying spring onions every week. The fix was embarrassingly simple: I kept a kitchen notebook for a fortnight, tallying every veg we actually ate. Carrots appeared daily, lettuce three times a week, tomatoes constantly in summer. That two-week snapshot became my planting blueprint.
Start by tracking what hits your plates, not what sounds impressive to grow. Note quantities too, we go through roughly 2kg of potatoes weekly, but only 200g of beetroot fortnightly. Multiply your fortnight’s tally by 26 to estimate annual needs, then cross-reference with realistic UK yields (a 3-metre row of carrots typically gives 4-5kg). This reveals you need six sowings of lettuce across the season, not one ambitious bed in May.
Factor in storage and preservation capacity. There’s no point growing 50kg of onions if you’ve nowhere to cure and store them. I learned to plant by seasons in smaller, staggered batches rather than gambling everything on one big spring push. Now we harvest what we need when we need it, and the courgette mountain is a cautionary memory.
Choosing High-Value, Reliable Crops
After years of ambitious planting that left me with gluts of courgettes nobody wanted and precious little stored for winter, I learned that not all crops earn their space. The real winners for family sustainability aren’t necessarily what you’ll see dominating allotment plots, they’re the ones that deliver consistent nutrition, store reliably, and don’t demand constant attention.
Potatoes top my list every time. A couple of raised beds can yield forty to sixty kilos, storing for months in a dark cupboard. We grow early, second early, and maincrop varieties to spread harvests from June through winter. Runner and French beans follow close behind. They crop prolifically through summer, freeze beautifully, and fix nitrogen for whatever follows them in rotation.
Onions and garlic are non-negotiable. Both store from July right through to the following spring, form the base of countless meals, and ask almost nothing beyond weeding. Learning to grow onions from sets transformed our self-sufficiency rate overnight.
For continuous cropping, perpetual spinach and chard beat lettuce hands down, they stand through winter, regenerate after cutting, and never bolt inconveniently. Calabrese and purple sprouting broccoli bridge the hungry gap when little else is ready. Squash delivers both summer courgettes and winter storage, making it a space-efficient choice for smaller gardens.
I’ve stopped growing sweetcorn and aubergines. They demand prime space for modest returns in our climate, and supermarket versions are affordable. Focus instead on what stores, what crops repeatedly, and what you genuinely eat weekly.
Important Safety and Soil Health Warnings
Before you plant a single seed, understand that family food production carries responsibilities you won’t face growing ornamentals. I learned this the hard way when a neighbour mentioned her plot sat on former industrial land, prompting me to test soil I’d already been digging for months.
Start with your soil, especially if you’re gardening in an urban area, near old buildings, or on a site with unknown history. Lead, arsenic, and heavy metal contamination won’t show in a visual inspection, but they’ll accumulate in your vegetables and eventually in your family. I sent samples to a professional lab (about £40 for a residential contamination screen) rather than rely on DIY kits, which miss crucial toxins. Former railway land, old orchards sprayed with lead arsenate, and Victorian industrial sites all warrant testing before you commit to organic sustainability.
Composting and manure handling demand attention too. Never compost pet waste, diseased plants, or perennial weed roots in a cold heap, you’ll spread problems rather than solve them. When sourcing manure, ask whether the animals were treated with aminopyralid or clopyralid herbicides; these persist through composting and will devastate your tomatoes and beans. I now only accept manure from known organic farms or let any suspect material age for at least eighteen months.
Keep children safe around the garden by establishing clear rules about tool use, storing secateurs and forks securely after each session, and fencing off areas where you’ve recently applied amendments. The goal is feeding your family safely, not just abundantly.
Step-by-Step: Establishing Your Produce Growing System
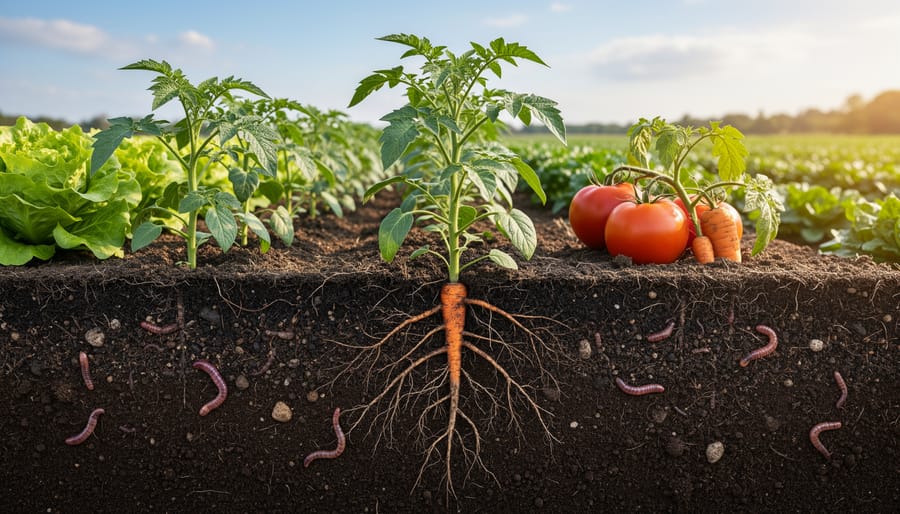
Step 1: Prepare Your Growing Space
I stood at the edge of our back lawn one March morning, marking out a rectangle with bamboo canes and string. My partner thought I’d lost it, digging up perfectly good grass to grow vegetables. But that 4m × 3m patch, catching southern sun from mid-morning onward, became the foundation of everything.
Choose your site by watching where sunlight falls. You need six hours minimum for most vegetables, eight for tomatoes and squash. I tracked our garden’s sun patterns over a week before committing. Avoid spots under trees or where downpipes create boggy patches after rain.
We stripped the turf using a sharp spade, slicing horizontally beneath the grass roots. Stack it upside-down in a corner, it becomes beautiful loam in twelve months. The exposed soil looked discouraging: heavy clay riddled with builder’s rubble. I spread a 10cm layer of well-rotted manure (£4 a bag from the local stables) across the entire area and forked it in, working in sections rather than trying to turn the whole plot at once.
For beds, I built simple frames from untreated scaffold boards (£12 each), creating two raised beds 1.2m wide, narrow enough to reach the centre from either side without stepping on the soil. Fill with a 50/50 mix of topsoil and compost.
Position a water butt near your beds before planting. Lugging watering cans across the garden gets old fast.
Step 2: Start Your First Succession Plantings
I learned this the hard way: plant too much at once and you’ll drown in courgettes come July, then have nothing fresh in September. The secret to continuous harvests is succession planting, sowing small amounts every few weeks rather than everything at once.
Start with the confidence-builders. I sowed radishes and rocket first because they’re ready in three to four weeks. These quick wins kept me motivated while waiting for slower crops. Every fortnight through April and May, I’d put in another short row of salads (lettuce, mizuna, spinach), always in a different spot. By June, we were cutting fresh leaves daily.
Whilst those quick crops were romping away, I planted the mainstays. Potatoes went in during March (first earlies) and April (maincrop). Courgette plants followed in late May after the last frost, just two plants, because honestly, that’s plenty for four people. Runner beans climbed their poles by early June, and I tucked in purple sprouting broccoli seedlings for next spring’s harvest.
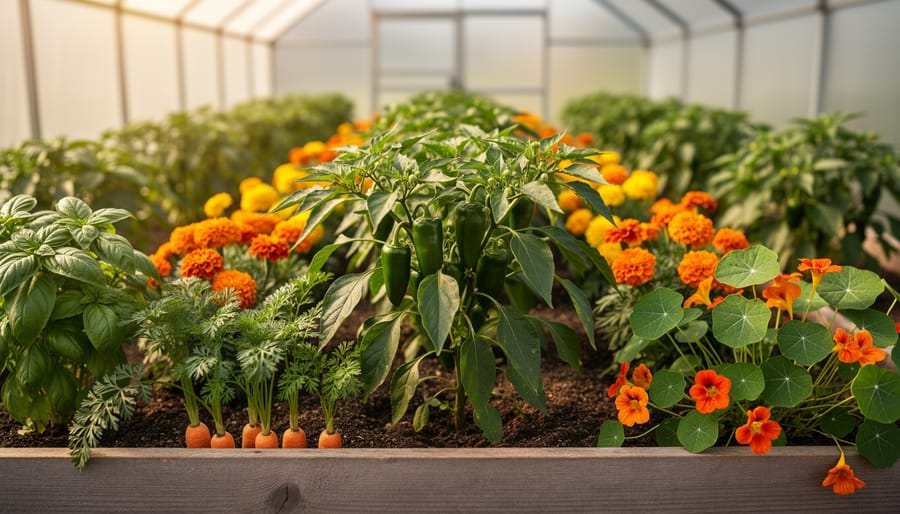
The timing feels overwhelming at first, but I kept it simple: something fast every two weeks, something substantial once a month. Pairing fast and slow growers through companion planting radishes between brassicas, lettuce under beans, maximised space and actually improved growth. By midsummer, the garden had transformed into a genuine food source rather than an experiment.
Step 3: Build Your Composting and Fertility System
I’ll be honest, when I first started growing for the family, I treated compost as an afterthought. A black plastic bin wedged behind the shed, occasionally stuffed with potato peelings, mostly ignored. It wasn’t until my second season, when I watched my courgette plants struggle despite everything I’d done right, that I realised I’d been mining the soil without giving anything back.
Now I run three bays: one active, one maturing, one ready to use. The simplest setup is wooden pallets wired together, costs nothing and works brilliantly. I throw in all vegetable scraps, coffee grounds, eggshells, spent plants (disease-free), grass clippings, and shredded cardboard. No cooked food, no meat, nothing that’ll attract rats.
The magic happens when you understand you’re feeding microbes, not plants. Those microbes break down organic matter and release nutrients your crops can actually use. I learned this from Sarah, a market gardener in Devon who hasn’t bought fertiliser in fifteen years. She taught me the green-brown ratio: roughly equal volumes of nitrogen-rich greens (fresh vegetation, kitchen waste) and carbon-rich browns (dry leaves, cardboard, straw). Too much green and it’s slimy; too much brown and nothing happens.
Turn it monthly. Within six months, you’ve got black gold that transforms your soil and closes the fertility loop completely.
Step 4: Establish Perennial and Long-Term Crops
I planted my first rhubarb crown in early March 2024, tucking it into a sunny corner with a generous helping of well-rotted manure. Two years on, that single crown now produces enough stems for weekly harvests from April through June, and I’ve done nothing beyond an annual mulch. That’s the beauty of perennials, you plant once and harvest for a decade or more.
Start with the workhorses: rhubarb and asparagus both want permanent beds where they won’t be disturbed, ideally enriched with compost to a spade’s depth. Space asparagus crowns 45cm apart in trenches, covering gradually as shoots emerge. You’ll wait two years before your first proper harvest, but then you’re looking at 15 to 20 years of spears each spring.
Fruit bushes slot into any spare corner. I’ve got blackcurrants along the north fence (they tolerate shade better than most), gooseberries flanking the path to the compost, and a tayberry scrambling up the garage wall. Plant bare-root stock between November and March for the best establishment. Most bush fruits crop lightly in year two, properly by year three, and keep producing for 10 to 15 years with minimal pruning.
Perennial herbs, rosemary, thyme, sage, oregano, anchor the edges of beds and need nothing but an occasional trim. They’re the easiest win: plant, forget, harvest forever.
Step 5: Implement Season Extension
I thought season extension would be complicated until I draped an old curtain over my first sowings one March evening. That makeshift frost protection taught me the real lesson: you don’t need expensive kit to keep cropping through winter.
Start with horticultural fleece in autumn, it’s cheap, reusable, and adds three to four degrees of warmth over salad leaves, spinach, and overwintering brassicas. Lay it directly onto crops or support it with hoops; either works. I keep mine pegged down from October through March, lifting only to harvest.
Cloches come next. Plastic bell cloches warm the soil in early spring for first sowings of carrots and beetroot, bringing harvests forward by weeks. For larger areas, make tunnel cloches from wire hoops and polythene, I built five-metre runs for under twenty pounds.
Cold frames bridge the gap between fleece and a polytunnel. Mine is an old window frame over a timber box, nothing fancy, but it grows lettuce and rocket all winter. Position it against a south-facing wall for extra warmth.
If you’re serious about year-round planning consider a small polytunnel. Even a two-metre-wide structure transforms what you can achieve from December to April, eliminating the hungry gap entirely. I waited three years before investing, and wish I’d done it sooner.
Checking Your Progress and Harvesting Success
I spent most of my first year wandering around the garden with a notebook, scribbling down what we’d harvested and wondering if we were actually getting anywhere. It felt a bit obsessive at first, but tracking what came out of the beds turned out to be the only reliable way to know whether our family sustainability project was working or just keeping me busy.
The simplest measure is yield weight. I kept a kitchen scale near the back door and weighed everything before it went into meal prep. By autumn, I could see patterns: we’d grown 47kg of potatoes (about two months’ worth for our family), 12kg of courgettes (possibly too many), and barely 3kg of carrots because I’d sown them too late and in compacted soil. Those numbers told me exactly where to focus the following year.
Percentage coverage matters more than total weight, though. We worked out that we were providing roughly 60% of our salad vegetables, 40% of root crops, and nearly all our summer courgettes, beans and tomatoes by the end of that first season. Zero percent of our onions, because I’d completely forgotten to plant sets in time. Knowing these gaps meant I could plan better storage crops and fill the calendar properly.
Beyond the harvest figures, watch for these signs your system has found its rhythm:
- Consistent weekly harvests across most of the growing season, not feast-or-famine cycles
- Darker, crumblier soil that smells earthy rather than sour or depleted
- Reduced need for bought compost, fertiliser or pest treatments as your closed-loop system matures
- Something to pick in every season, including winter salads or stored roots during the hungry gap
- Family members checking the beds unprompted and asking what’s ready to eat
Soil health improvements take longer to measure but matter deeply. I started doing simple jar tests, shaking soil with water to see the layers settle, and noticed more organic matter building up by year two. Worm populations exploded once the compost system got going. These aren’t things you harvest, but they’re what make future harvests possible without constant external inputs.
Success isn’t feeding the family entirely from the garden in year one. It’s closing the gap steadily, learning which crops suit your soil and schedule, and reaching the point where the garden gives back more fertility than you put in. When you stop buying salad bags and start planning meals around what’s ready outside, you’ve built something genuinely sustainable.
Common Questions About Growing for Family Sustainability
Over the years of writing about family sustainability gardening, certain questions come up again and again. These are the practical concerns that every beginner faces, and honestly, they’re the same ones I wrestled with when I started. Here are the answers I wish I’d had from the beginning.
How much space do I actually need to make a difference?
You can grow a surprising amount in just 20-30 square metres if you choose productive crops and succession plant. I started with two 1.2m x 3m beds and managed salads, courgettes, climbing beans, and tomatoes for a family of four throughout summer.
How much time does this really take each week?
Expect two to three hours weekly during the growing season once established, though spring planting might need five to six hours some weeks. Autumn and winter maintenance drops to an hour or less, mostly harvesting and planning.
Can I involve young children without things going wrong?
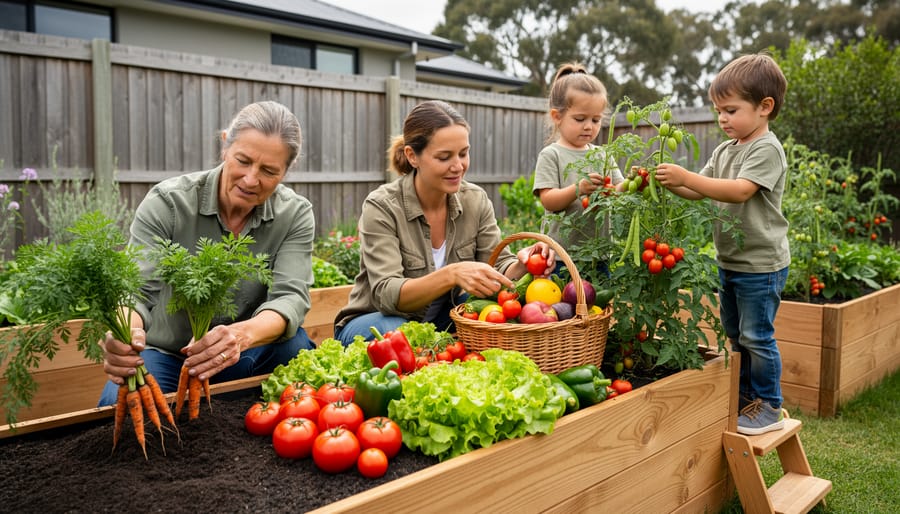
Absolutely. Give them their own small patch for quick crops like radishes and nasturtiums, and assign simple tasks like watering or harvesting cherry tomatoes. They’ll make mistakes, but that’s how they learn, and their enthusiasm often reignites yours.
What do I do when a whole crop fails?
Accept it and move on. I’ve lost entire sowings to slugs, pigeons, and my own timing mistakes. Write down what happened, adjust for next time, and remember that even a 60% success rate means you’re eating homegrown food most weeks.
The question about scaling up deserves a longer answer because I see people trying to do too much too fast. Start with three or four crop types you actually eat regularly. Master those. Get a feel for your soil, your microclimates, the rhythm of the seasons. Then add one or two new crops each year. I’m in my fifth year now and still learning, still expanding gradually. There’s no prize for attempting everything in year one and burning out by July.
Another common worry is whether it’s worth the effort financially. I don’t track every penny, but I know we’ve stopped buying salad bags, courgettes, beans, tomatoes, and potatoes for six to eight months of the year. The real value isn’t just the money saved. It’s eating food twenty minutes from plant to plate, knowing exactly what’s gone into growing it, and teaching my children that food comes from soil and care, not just supermarket shelves.
People also ask whether they need to be naturally green-fingered. You don’t. I killed more plants than I grew in my first season. What you need is persistence, observation, and willingness to learn from what goes wrong. The garden teaches you if you pay attention.
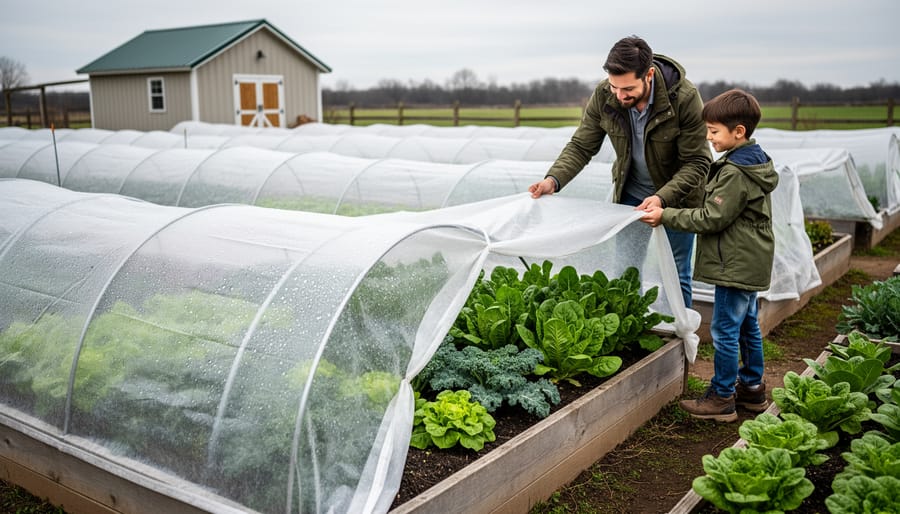
Standing in the garden on a damp November morning, harvesting kale for tonight’s dinner while the kids argue over who gets to dig the carrots, I’m struck by how much has shifted. We’re not self-sufficient, far from it, but we’ve changed how we think about food. The supermarket trolley looks different now. We buy less, waste almost nothing, and the children understand that courgettes don’t just appear in plastic wrap.
This transformation didn’t happen in a season. It took three years before the garden felt like it was running itself, before I stopped panicking about crop failures and started seeing them as learning opportunities. Some experiments flopped spectacularly. Others exceeded every hope.
If you’re just beginning, resist the urge to do everything at once. Plant a few reliable crops, establish one good habit, see what works in your particular patch of earth. The mistakes matter less than keeping going.
I’d love to hear where you are on this journey. What’s growing well for you? What’s proving harder than expected? Drop a comment below, we’re all learning together.