Growing onions from sets or seed takes four to five months from planting to harvest, and the process rewards you with one of the most versatile crops you’ll ever store in your kitchen. I’ve been cultivating onions in my Derbyshire allotment for nearly a decade, and the satisfaction of plaiting my own onion strings each August never diminishes. The key lies in choosing the right variety for your climate, preparing well-drained soil enriched with compost, and recognizing the telltale signs that your bulbs are ready to lift.
Last spring, I visited Tom Wilkinson, a third-generation onion grower in Lincolnshire, who taught me that most home gardeners harvest too early. “Wait until at least half the foliage has collapsed naturally,” he told me as we walked through his drying sheds. “That’s when the bulb has stopped growing and the neck has sealed properly.” His advice transformed my storage success rates.
Whether you’re planting heat-treated sets in March or sowing seed under cover in February, onions demand attention at specific growth stages but otherwise look after themselves remarkably well. The challenge isn’t in the day-to-day care, which amounts to regular weeding and occasional watering during dry spells. The real skill emerges at harvest time, when you must balance patience with weather conditions to lift bulbs at peak maturity, then cure them properly for months of kitchen use.
This guide walks you through every stage, from soil preparation through to storing your crop well into winter, with the practical markers you need to verify you’re on track at each phase.
What You’ll Need to Grow Onions Successfully
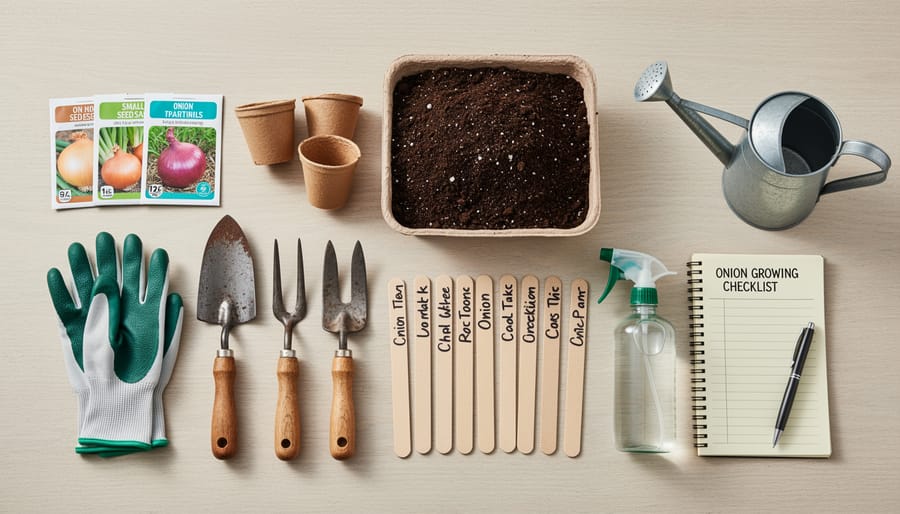
Before I planted my first onions years ago, I wandered around the garden centre utterly bewildered by the sheer range of options. Here’s what actually matters, stripped of the confusion.
The most fundamental choice is between onion sets, seeds, or transplants. Sets are small, immature bulbs that you push into the soil, and they’re brilliantly forgiving for beginners. Seeds offer far greater variety and cost less, but they demand patience and a bit more skill. Transplants sit somewhere in between, giving you a head start without the fiddly seed-sowing stage. I’ve tried all three, and sets remain my go-to for reliability, though I always plant a row of seeds when I fancy experimenting with heritage varieties.
You’ll need decent soil amendments regardless of your planting method. A good multi-purpose compost or well-rotted manure makes an enormous difference, especially if your soil is heavy clay or exhausted from previous crops. I add a handful of blood, fish and bone fertiliser per square metre before planting, which gives onions the slow-release nutrients they crave without overwhelming them.
For tools and materials, gather the following essentials:
- Onion sets, seeds, or transplants appropriate for your growing season
- Multi-purpose compost or well-rotted manure for soil improvement
- Garden fork for loosening soil and lifting mature bulbs
- Hand trowel for creating planting holes
- Watering can with a rose attachment for gentle initial watering
- Horticultural fleece or netting to protect against onion fly
- Optional: dibber for making uniform holes, labels for marking varieties, cloches for early starts
Most garden centres stock everything you need, though I’ve had brilliant luck with heritage sets from specialist suppliers like Marshalls and D.T. Brown. Incorporating garden planning tips at this stage helps you avoid overcrowding and ensures you’ve allocated enough space for proper bulb development. That investment in preparation pays dividends when harvest arrives months later.
Important Considerations Before You Start
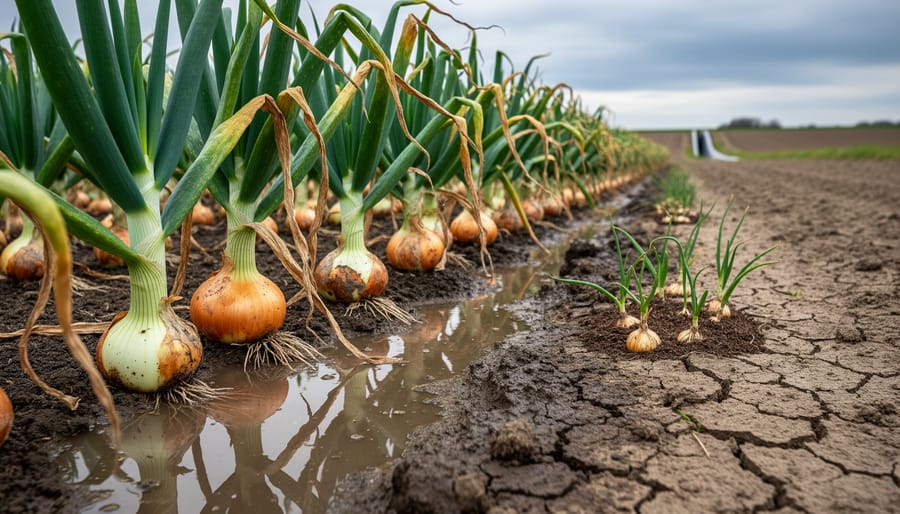
I learned about onion pitfalls the hard way during my first attempt, excited to get going, I skipped soil testing and planted sets in a low-lying bed that pooled after rain. Within weeks, half the bulbs rotted where they sat, and the survivors formed tiny, misshapen things barely worth harvesting. That painful lesson taught me to pause before planting and check a few critical conditions first.
Onions demand well-drained soil, they will not tolerate sitting in waterlogged ground. If puddles linger in your chosen spot after heavy rain, either improve drainage with grit and organic matter or pick a different location entirely. Test your soil pH with a simple kit from any garden centre; onions thrive between 6.0 and 7.0. If your reading falls outside that range, amend with lime to raise pH or sulphur to lower it, and retest before planting.
Timing mistakes cost many first-timers their crop. Planting too early when soil is cold and waterlogged invites fungal disease; planting too late in spring means bulbs won’t size up before midsummer triggers harvest. In the UK, that usually means late March to early April for spring sets, or September for overwintering varieties.
Pest vulnerabilities matter too. Onion fly larvae burrow into young plants and destroy them from within, while thrips cause silvery streaking on leaves. A local allotment holder shared brilliant allotment advice with me: grow onions away from last year’s spot, use fine mesh netting in May and June when flies are active, and inspect foliage weekly for early signs of trouble. Catching problems early makes all the difference.
Step-by-Step: Planting Your Onions
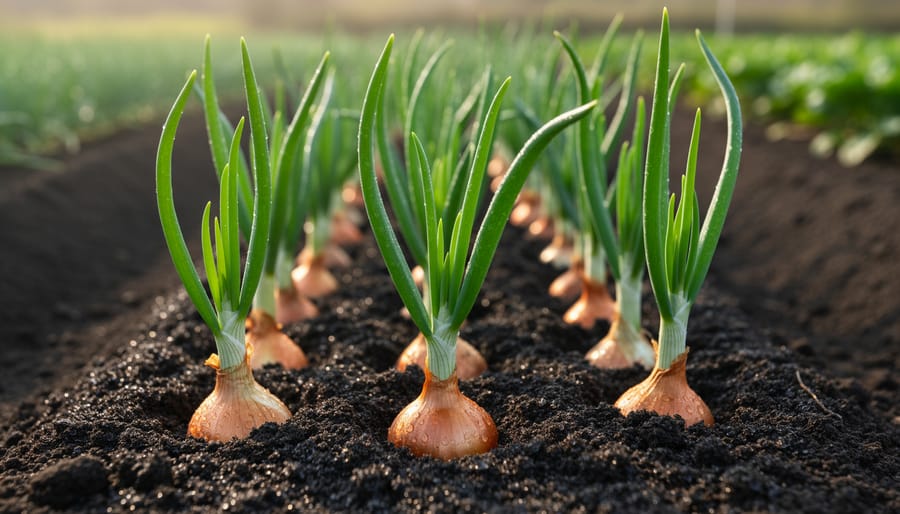
Choosing Between Sets, Seeds, and Transplants
I’ve tried all three methods over the years, and each has earned a place in my onion-growing routine depending on what I’m after.
Sets are my weeknight dinner of gardening, quick, reliable, and nearly foolproof. These are small, partly-grown bulbs that you simply push into prepared soil. They establish fast, tolerate beginners’ mistakes, and give you a crop with minimal fuss. When I first started growing onions, sets saved me from total failure. The downside? Limited variety. Most garden centres stock only standard yellows and reds, rarely the sweet Spanish types or unusual heirlooms that make cooking more interesting.
Seeds open up that variety treasure chest. I can choose from dozens of cultivars: long-keepers, exhibition giants, or those mild salad onions perfect for pickling. But seeds demand patience. You’ll need to start them indoors in late winter, thin seedlings, and coddle them through weeks of growth before they’re garden-ready. My germination rates hover around seventy percent even now, so I always sow extra.
Transplants split the difference, young plants you buy or raise from seed, then plant out when they’re pencil-thick. You get better variety than sets but skip the fiddliest seedling stage. I buy a few trays when I’m feeling lazy or if I’ve forgotten to start seeds on time.
For your first crop, grab sets and enjoy success. Once you’re hooked, experiment with seeds for that purple torpedo variety you spotted in a seed catalogue.
Timing Your Planting for Best Results
I’ve grown onions both ways, and choosing the right planting window makes a huge difference to your harvest size. Spring planting (March to April) suits most beginners because the soil warms up, growth is straightforward, and you’ll lift bulbs by late summer. I started this way and still favour it for reliability. Autumn planting (September to October) gives you a head start, overwintered sets bulk up earlier and often yield larger onions by June or July, but you need well-drained soil and a bit of nerve when frost hits. One wet autumn, half my sets rotted before winter even arrived, which taught me that weather and gardening decisions go hand in hand. If your plot is heavy clay or exposed, stick with spring. For lighter soils and a longer harvest spread, try both: spring sets for your main crop and a few autumn ones as an experiment. Check UK planting timing guidance for your region’s frost dates, then adjust based on what your soil tells you each season.
Caring for Growing Onions Through the Season
Once your onions are in the ground, the real work begins, but it’s honestly less demanding than you might think. I learned this during my second season when I fretted over them constantly, only to realize they’re remarkably self-sufficient if you nail a few essential tasks. The trick is establishing a rhythm that fits your schedule while keeping the plants healthy.
Weeding ranks as your most important job. Onions have shallow root systems and wispy foliage, so they struggle to compete with aggressive weeds for nutrients and water. I spend ten minutes each week running my hand carefully along the rows, pulling anything green that shouldn’t be there. It’s meditative work, and catching weeds while they’re tiny saves hours of backbreaking labor later. Never use a hoe too close to the bulbs, I nicked several onions my first year and they rotted where the skin broke.
Watering needs shift as the season progresses. Early on, keep the soil consistently moist but never waterlogged, about an inch of water weekly does the job, whether from rain or your watering can. As bulbs swell in mid-summer, maintain that moisture level but stop watering entirely two weeks before harvest to help skins toughen. During our unusually dry June last year, I watered every three days in the evening, soaking the soil thoroughly rather than sprinkling daily.
Feeding isn’t complicated. I scatter a balanced granular fertilizer (something like 10-10-10) around the plants about six weeks after planting, keeping it away from direct contact with the stems. After that, I leave them alone unless the foliage looks pale yellow, which signals nitrogen deficiency. Overfeeding produces lush tops but smaller bulbs, something I learned the hard way.
Pests will test your patience. Onion fly devastated half my crop in year three, the larvae burrowed into bulbs and turned them to mush. Now I cover young plants with horticultural fleece until early summer, and I’ve had no significant damage since. Sarah Jenkins from the RHS once told me, “The best pest control is catching problems early. Walk your rows twice weekly and look for yellowing leaves or wilting, by the time damage is obvious, you’ve often lost that plant.”
Watch for leaf discoloration, particularly rust-colored spots (onion rust) or fuzzy grey mold (downy mildew). Good spacing and air circulation prevent most fungal issues, which ties back to diligent weeding. Part of effective seasonal garden care means adjusting your attention as crops mature, onions need you most during those middle months when growth accelerates.
Knowing When Your Onions Are Ready to Harvest
I learned to read onion readiness the hard way after yanking up my first crop two weeks too early, leaving me with watery bulbs that rotted in storage within a month. Now I watch for a reliable set of signals that tell me it’s truly time.
The clearest sign comes from the foliage. When about 50-75% of your onion tops have yellowed and flopped over naturally, you’re in the harvest window. This usually happens in July for spring-planted sets and September for autumn-planted varieties, but the calendar matters less than what the plants show you. The necks will feel soft rather than rigid when you gently squeeze them just above the bulb.
I test readiness by carefully scraping away soil from a couple of bulbs to check their size and skin. The outer papery layers should be forming properly, even if they’re still damp underneath. If the bulbs look undersized or the skin seems thin and fragile, I give them another week before checking again.
Harvesting too early means poorly developed bulbs with thick, moist necks that won’t cure properly. They’ll sprout or rot in storage, wasting all your effort. Wait too long after the tops fall, though, and the bulbs can split or start sending up new shoots, which also ruins storage potential. One year I left a row an extra three weeks during a rainy spell and lost nearly half to splitting and secondary growth.
The sweet spot is within two weeks of most tops falling over. On a dry day, gently lift one test bulb with a fork. If it comes up clean with well-formed layers, the rest are ready to harvest.
Step-by-Step: Harvesting Your Onion Crop
The actual harvest day is thrilling, but rushing it can undo months of care. I learned this the hard way one September when impatience led me to yank onions straight up from compacted soil, snapping off tops and bruising bulbs that rotted within weeks.
Here’s the method that’s served me well since:
- Check the weather forecast and aim for a dry spell of at least two to three days. Harvesting into rain creates storage headaches.
- Loosen the soil around each bulb with a garden fork, working about four inches away from the stem to avoid piercing the onion itself. Push the fork in at an angle and gently lever upward.
- Lift each bulb by grasping the base of the foliage close to the neck, not by pulling on the dried leaves which may detach. The bulb should come away easily if you’ve loosened the soil properly.
- Lay the onions on the soil surface or on a wire rack if the ground is damp, spacing them so air can circulate. Leave them for a few hours to a full day if conditions are dry and sunny.
- Move the onions to a covered, well-ventilated area such as a greenhouse, shed, or under a polytunnel. Direct sun is fine initially, but prolonged exposure can scald the skins.
- Turn the onions every couple of days to ensure even drying on all sides, particularly where they’ve been resting on a surface.
If you’re faced with muddy conditions, resist the urge to wash the bulbs. Instead, gently brush off excess soil once they’ve dried a bit, or let it fall away naturally during curing. Thick-necked onions where the foliage hasn’t properly died back won’t store well, so set those aside for immediate use in the kitchen. I keep a basket by the door for these “eat-me-first” specimens, and they’re usually gone within a fortnight in soups and stews.
Curing and Storing for Months of Use
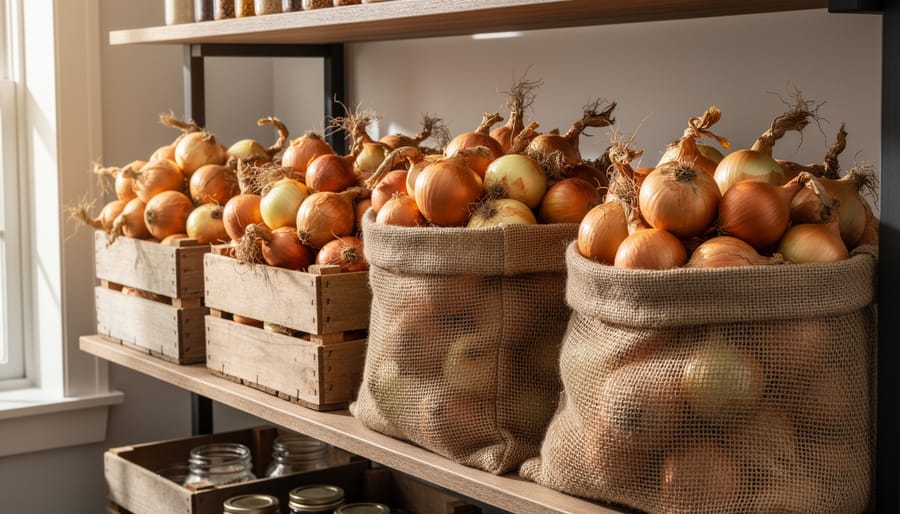
The moment you lift your onions, the clock starts on curing, the make-or-break phase that determines whether you’ll enjoy your crop until next spring or watch it rot by November. I learned this the hard way in my second year of growing, when I stacked freshly-harvested onions straight into a cardboard box in the shed, pleased with myself for being organised. Three weeks later, the smell hit me: a third of the crop had turned to mush because I’d skipped the drying stage entirely. That mistake taught me more about storage than any book ever could.
Proper curing means spreading your onions in a single layer somewhere warm, dry, and well-ventilated for two to three weeks. I use old window screens propped on bricks in my greenhouse, which lets air circulate all around each bulb. If you haven’t got greenhouse space, a sunny garage, covered porch, or even indoors near a sunny window works fine, just keep them out of direct rain and away from damp floors. The goal is to dry the outer skins until they’re papery and the necks shrivel right down to nothing.
Once cured, sort through your haul ruthlessly. Any onion with a thick, soft neck, visible damage, or sprouting won’t keep, so set those aside for immediate kitchen use. The keepers get stored in mesh bags, old tights with knots between each bulb, or shallow crates, anything that allows airflow. I’ve had best results hanging mesh bags from hooks in my unheated shed, where temperatures hover around 4-10°C through winter. My kitchen-stored onions, though convenient, never lasted past January because the warmth encouraged sprouting.
Well-cured onions in proper conditions should keep five to eight months. Check them monthly, removing any that soften. That simple discipline has turned harvesting from a one-day event into a supply that carries me through until the next crop starts.
Common Questions About Growing and Harvesting Onions
Over the years, certain questions crop up again and again in my inbox and on the allotment, so let me tackle the most common ones based on what I’ve learned through trial, error, and plenty of conversations with fellow gardeners.
Can I grow onions successfully in containers?
Absolutely, and I’ve had good results with shallow-rooted varieties like ‘Paris Silverskin’ in pots at least 25cm deep. Just ensure excellent drainage and be prepared to water more frequently than you would in the ground, especially during dry spells.
Why are my onions bolting and how do I stop it?
Bolting happens when onions experience stress from cold snaps followed by warmth, prompting them to flower prematurely. Choose bolt-resistant varieties for spring planting, and if you spot a flower stalk forming, remove it immediately and use that onion first since it won’t store well.
What about regrowing onions from kitchen scraps?
You can stick an onion base with roots in soil and it’ll sprout green tops for cooking, but it won’t form a proper bulb worth harvesting. I keep a few in pots on the kitchen windowsill purely for snipping spring-onion-style greens into salads.
How do I save seeds from my onions?
Let a healthy plant bolt, allow the flower head to mature and dry completely on the stalk, then collect the tiny black seeds from the papery capsules. Bear in mind most shop-bought sets are F1 hybrids, so saved seeds might not produce identical offspring.
What’s the difference between organic and conventional onion sets?
Organic sets come from pesticide-free growing systems and often cost more, while conventional sets may have been treated with fungicides to prevent rot during storage. I use both depending on what’s available, though organic sets sometimes need extra vigilance against early disease.
My onions turned out small and disappointing, what went wrong?
Small bulbs usually result from overcrowding, poor soil fertility, or insufficient water during the bulbing phase in early summer. Space them properly, work in compost before planting, and keep the soil consistently moist from late May onwards for the best size.
The beauty of onions is that even when things go sideways, you still learn something valuable for next season. I’ve had crops that barely filled a basket and others that kept us stocked until the following spring, and each year taught me to pay closer attention to what the plants were actually telling me. Don’t be discouraged by setbacks, every experienced gardener I know has stories about onion disasters that eventually led to their best harvests.
There’s something deeply satisfying about pulling your first onion from the soil, wiping off the earth, and knowing you’ve grown it from nothing more than a tiny bulb or seed. I still remember the quiet pride I felt curing that first harvest on my shed floor, watching the skins turn papery and golden. It wasn’t just about having onions for months of cooking, it was about understanding the rhythm of a crop, learning to read the plants, and feeling properly connected to what I eat.
If you’re just starting out, don’t let the learning curve put you off. Every gardener has killed a few onions through overwatering, harvested too early, or lost a crop to onion fly. It’s how you learn. Start small, observe closely, and trust your instincts as they develop.
I’d love to hear how your onion growing goes, whether you’re wrestling with bolting problems, celebrating your first successful storage crop, or puzzling over something I haven’t covered here. Drop a comment below and let’s keep the conversation going. That’s what Great Gardens UK is all about: real gardeners sharing real experiences, learning together, and helping each other grow better crops year after year.