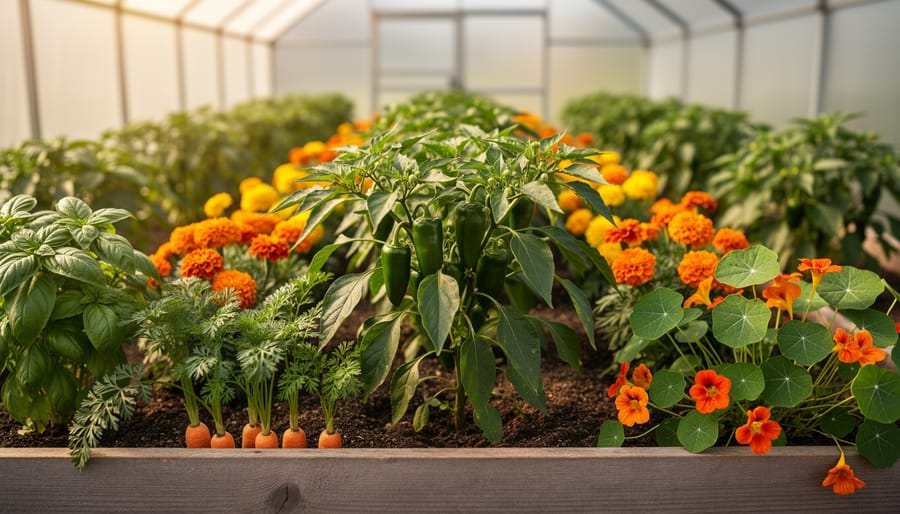
I learned to companion plant the hard way three summers ago, when my prized tomatoes succumbed to whitefly whilst the neighbouring allotment’s thrived, protected by a simple border of French marigolds. That moment taught me what most gardening books gloss over: knowing which plants to pair is only half the battle. The real skill lies in how you arrange them.
Companion planting methods fall into three core approaches, each with distinct advantages depending on your space and growing goals. Row intercropping suits traditional vegetable plots, where you alternate rows of compatible plants to maximise pest control and nutrient sharing. Mixed intercropping works brilliantly in smaller beds, blending compatible species throughout a single growing area. Trap cropping takes a more strategic angle, using sacrificial plants positioned at bed edges to lure pests away from your main crops.
What surprised me most during my own trial-and-error phase was how placement timing matters as much as plant selection. I spoke with Sarah Raven last spring, who emphasised that staggered planting dates often determine whether companion relationships actually function. Plant your basil too late alongside tomatoes, and you’ve missed the critical window when aphids first scout for hosts.
The methods themselves aren’t complicated, but they do require a shift in how you visualise your garden. Rather than thinking in monoculture blocks, you’re orchestrating relationships between plants with different root depths, growth habits and chemical signatures. Done properly, companion planting reduces your reliance on interventions whilst improving yields. Done carelessly, it creates competition for light and nutrients that weakens everything in the bed.
What You’ll Need to Get Started
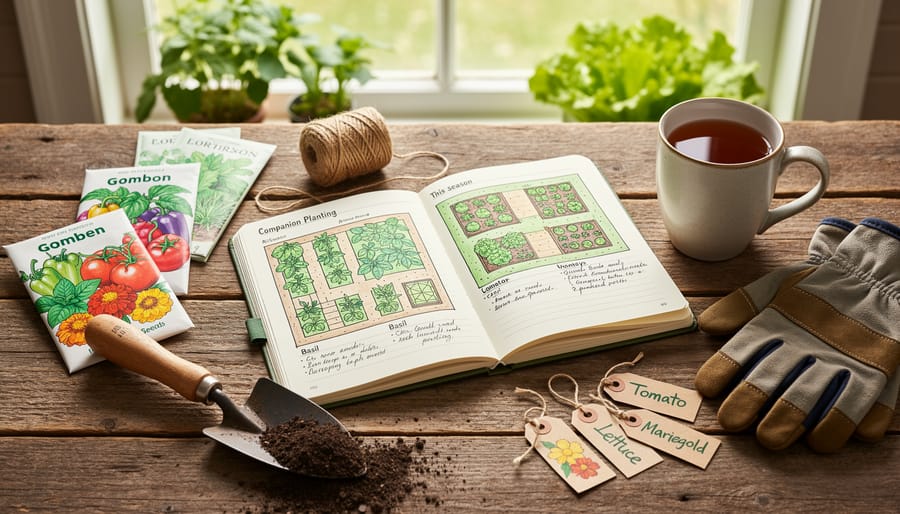
Before I started companion planting in earnest, I grabbed a tatty notebook and a handful of seed packets, thinking that would do. It didn’t. I quickly realised that successful companion planting needs a bit more organisation, not fancy equipment, but the right basics to help you make smart decisions and track what actually works.
Here’s what you’ll want to gather before you start planting companions side by side:
- A garden journal or planning notebook for recording pairings, spacing, and results
- Plant identification resources, apps, books, or reliable websites, to confirm what you’re growing
- Seed packets or seedlings of compatible plants, chosen based on proven companion relationships
- Basic soil testing supplies to check pH and nutrient levels before pairing heavy and light feeders
- Reference guides or charts showing which plants support or hinder each other
The journal matters most. I’ve learned this the hard way after forgetting which bed had my failed tomato-fennel experiment three years running. Your garden planning notes become your personal companion planting database, showing which pairings thrived, which flopped, and why.
Soil testing sounds fussy, but it takes ten minutes and saves weeks of wondering why your nitrogen-hungry brassicas are sulking next to equally greedy companions. You’ll spot mismatches before they happen rather than after your courgettes have bullied everything else into submission.
Reference guides prevent expensive mistakes. I once confidently planted potatoes near tomatoes, both Solanaceae, both my favourites, only to discover they share diseases and pests. A decent companion planting chart would have stopped that disaster before I’d even bought the seed potatoes.
Before You Plant: Important Considerations and Warnings
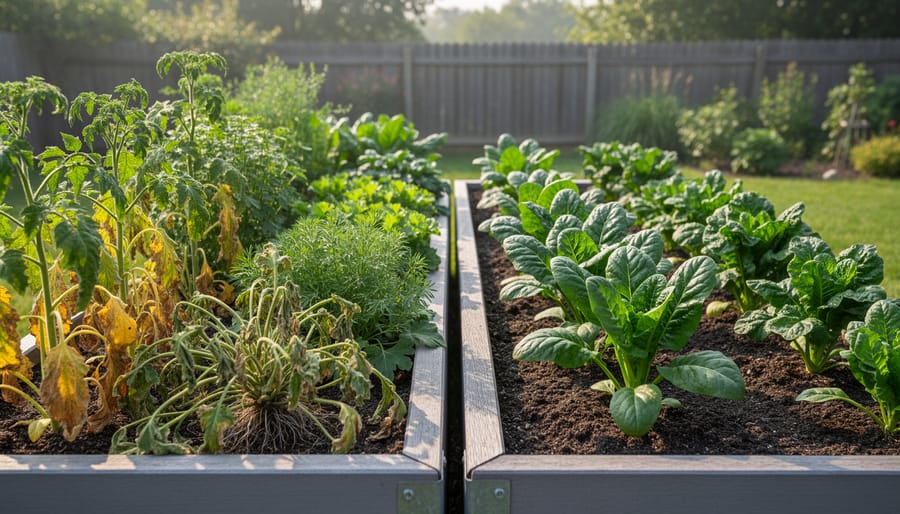
I learned about companion planting’s darker side the hard way when I enthusiastically planted fennel next to my beloved tomatoes. Within weeks, the tomatoes looked stunted and miserable, fennel, it turns out, inhibits nearly everything around it. That mistake taught me to research before pairing, not after.
The most critical warning involves allelopathic plants, those that release chemicals suppressing nearby growth. Black walnut is the notorious villain here, its roots secreting juglone that kills tomatoes, potatoes, peppers and many other vegetables within its drip line. Fennel, as I discovered, produces similar inhibitors. Sunflowers and eucalyptus also fall into this troublesome category. If you’re gardening near established trees, check whether they’re allelopathic before planting anything valuable nearby.
Spacing problems cause more failures than most gardeners realise. Planting too densely creates competition for light, water and nutrients, negating any companion benefits. I’ve watched well-intentioned gardeners cram six plants into a space suited for three, then wonder why nothing thrives. Measure your spacings and resist the temptation to squeeze in extras.
Timing mismatches present another pitfall. If you plant heat-loving basil alongside spring lettuce, one will always suffer, the lettuce bolts in summer heat just as the basil hits its stride. Understanding how weather affects gardening helps you avoid pairing plants with incompatible seasonal preferences. Match companions not just by beneficial relationships but by their growing calendars, or you’ll end up harvesting one while trying to establish the other.
The Three Core Companion Planting Methods
Method One: Spatial Companion Planting Step-by-Step
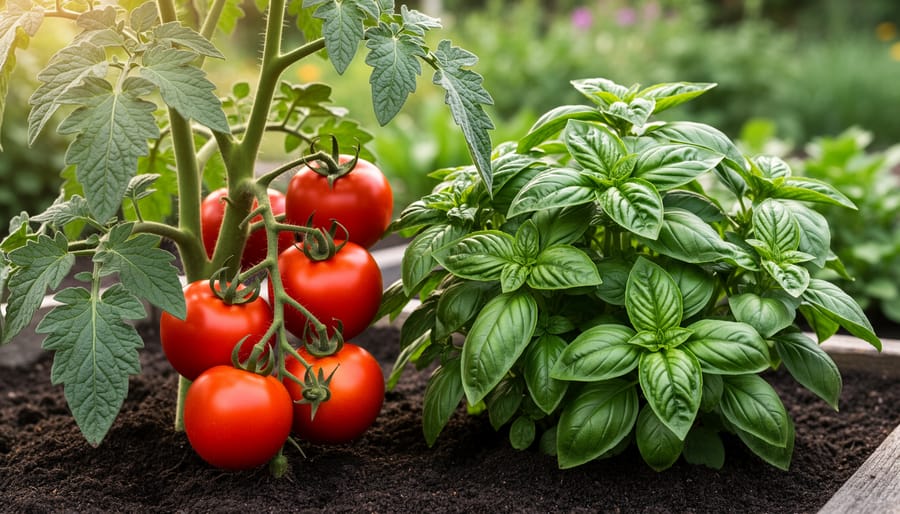
Spatial companion planting is where most gardeners start, and honestly, it’s where I’ve had my most satisfying successes. This method places compatible plants side-by-side in the same growing area at the same time, letting them support each other throughout the season. I still remember the first time I paired tomatoes with basil and marigolds, the basil seemed to bring out more flavour in the fruits, while the marigolds kept aphids at bay. That simple trio convinced me to get more deliberate about my planting arrangements.
Here’s how to implement spatial companion planting effectively:
- Walk your garden at different times of day to understand where sun falls, how shadows shift, and which spots stay damp or dry longer. Note any microclimates like sheltered corners or exposed edges, these will influence which companions thrive where.
- Choose plant pairings that complement each other physically and nutritionally. Pair deep-rooted carrots with shallow-rooted lettuce, or nitrogen-fixing beans with heavy-feeding brassicas. Consider height too: plant tall crops on the north side so they don’t shade shorter neighbours.
- Sketch your bed layout on paper before you touch soil. Mark spacing requirements for each plant at maturity, not transplant size. I learned this the hard way when my courgettes engulfed neighbouring herbs because I’d crammed them too close.
- Amend soil according to what you’re planting together. If pairing hungry tomatoes with modest-feeding basil, concentrate compost around the tomato roots rather than spreading it uniformly. Different companions often have different pH preferences too.
- Plant companions either simultaneously or stagger them by a week or two if one needs a head start. I plant lettuce around my tomato transplants while the tomatoes are still small, harvesting the lettuce before the tomatoes need the space.
- Check spacing weekly as plants develop. Thin overcrowded areas promptly and prune aggressively if companions start competing. The three sisters combination, squash, beans, and sweetcorn, works brilliantly, but only if you give each plant room to establish before they intertwine.
The beauty of spatial planting is its flexibility. You’re not locked into rigid rows or geometric precision. Some of my best combinations happened when I tucked parsley between rose bushes or let nasturtiums scramble beneath runner beans. The key is thinking in layers and functions rather than just filling space.
Method Two: Temporal (Succession) Companion Planting Step-by-Step
I stumbled into temporal companion planting by accident, really. One spring, I’d sown a generous row of lettuce and rocket that we devoured by mid-June, leaving a bare patch of beautifully friable soil just as my tomato seedlings were desperate for a permanent home. Planting them there felt efficient rather than strategic, but the tomatoes thrived beyond any I’d grown before. That season taught me what temporal companion planting truly means: it’s not about plants growing together simultaneously, but about using the same space in a choreographed sequence that benefits both crops and soil.
The beauty of this method lies in maximizing your growing season and soil health without needing additional garden space. Here’s how to implement it successfully:
- Calculate your actual growing season by noting your last spring frost and first autumn frost dates, then count the frost-free weeks between them. Most UK gardens have 150 to 200 days, though this varies by region.
- Sort your desired crops into quick finishers (lettuce, radishes, spinach finishing in 30 to 60 days) and slow growers (tomatoes, squash, brassicas needing 70 to 120 days). List what you want to grow with realistic maturity times from your seed packets.
- Map succession sequences that make botanical and practical sense. Spring peas naturally fix nitrogen, then finish by early July, creating perfect conditions for nitrogen-hungry beans or courgettes. Early potatoes harvested in June leave enriched soil ready for autumn calabrese or leeks.
- Get your early-season companions in the ground as soon as soil is workable. I plant salad leaves, broad beans, and radishes in March, knowing they’ll vacate premium space by midsummer when heat-lovers need it most.
- Between plantings, refresh the soil rather than exhausting it. After harvesting spring crops, I fork in a couple of inches of compost and let the bed rest for a week. This brief pause prevents disease carryover and replenishes nutrients.
- Introduce your next-season companions just as predecessors finish. Don’t wait until the bed is completely bare. I transplant tomato seedlings when lettuce still has a fortnight left, allowing the young plants to establish roots before the salads come out entirely.
The rhythm becomes intuitive after a season or two. You’ll start noticing natural handover points: when your garlic tops yellow in June, French beans are ready to go in. When summer spinach bolts in the heat, it’s time for kale seedlings. Each succession teaches you something about timing and your particular plot’s quirks.
Method Three: Trap Cropping and Sacrificial Planting Step-by-Step
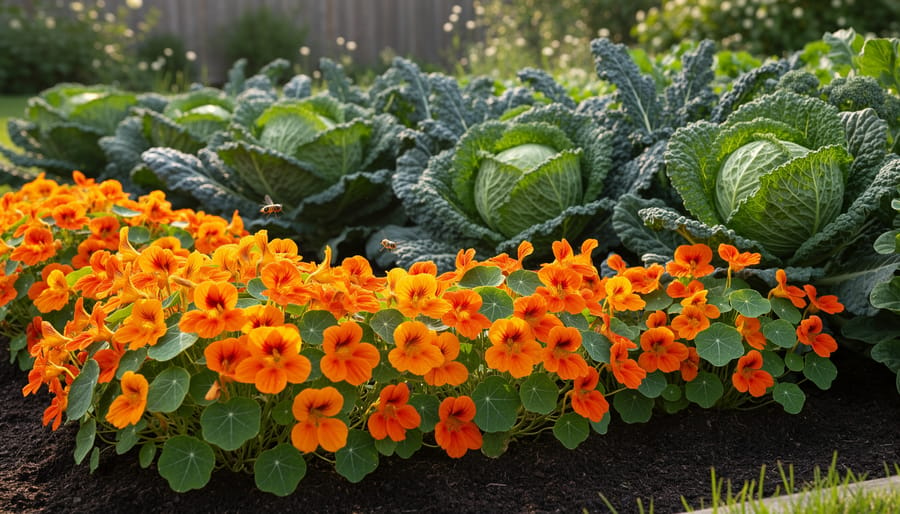
I’ll be honest: the first time I planted nasturtiums around my purple sprouting broccoli, I thought they were just there to look pretty. Within a fortnight, I noticed the nasturtium leaves covered in blackfly whilst my brassicas remained pristine. I’d stumbled onto trap cropping by accident, and it changed how I approached pest management entirely.
Trap cropping works on a delightfully simple principle: offer pests something they prefer more than your prized vegetables, then intercept them before they reach your main crops. It’s not about eliminating pests completely, that’s a fool’s errand in any garden, but about creating a strategic diversion that keeps damage manageable without resorting to sprays.
- Identify your main pest problems. Spend a few weeks observing which insects consistently attack your crops. Are aphids clustering on your beans? Do cabbage white caterpillars decimate your kale? Note the timing too, when do these pests typically arrive in your garden? I keep a simple tally in my notebook: pest type, which plants they target, and when I first spot them each season.
- Research which plants attract those specific pests. Once you know your adversaries, find their favourite plants. Aphids adore nasturtiums and marigolds. Flea beetles prefer radishes and Chinese cabbage over aubergines. Cabbage whites often choose French marigolds and decoy brassicas over main crops. Your local garden centre or RHS resources can help match trap crops to your specific pests.
- Position trap crops at garden perimeter or between valuable plants. I plant nasturtiums in a border around my brassica bed, creating a protective ring. Some gardeners prefer interplanting, a row of radishes between aubergine plants, for instance, but I find perimeter placement easier to monitor and manage without disturbing main crops.
- Plant trap crops slightly earlier to establish them first. This timing matters more than you’d think. Sow your trap crops a week or two before your main vegetables so pests find them established and tempting when they arrive. My nasturtiums go in three weeks before I transplant brassica seedlings.
- Monitor trap crops for pest accumulation. Check your sacrificial plants every few days. You’ll see the strategy working when insects congregate there rather than spreading across your vegetables. It’s oddly satisfying to watch aphids pile onto nasturtium stems whilst your cabbages stay clean.
- Decide whether to remove infested trap crops or leave them as ongoing sacrifices. This depends on pest severity. Heavy infestations might need removing, I sometimes snip badly affected nasturtium stems and bin them. Light infestations I leave, as they keep attracting new arrivals away from vegetables and beneficial insects often move in to feast on the pests.
The beauty of this method is its flexibility. Last season, I combined trap cropping with spatial planting: nasturtiums at the edges, French marigolds interspersed with tomatoes, and radish sacrifices near my aubergines. The system isn’t perfect, some pests still find their way through, but it’s reduced damage by what I’d estimate as seventy percent compared to when I did nothing.
Checking Your Results: How to Know If It’s Working
The real magic of companion planting reveals itself gradually, not overnight. I’ve learned that patience matters here, give your plant partnerships at least four to six weeks before making firm judgments, though some benefits appear within days.
Watch for the telltale signs of success. Healthier, more vigorous growth in your main crops is the most obvious indicator. I noticed this with my tomatoes once I paired them with basil, the plants developed stronger stems and darker foliage than those grown alone. Fewer pest problems count as another win. If your trap crops are drawing aphids away from prize lettuces, or your marigolds are keeping whitefly at bay, you’re seeing companion planting work its magic.
Improved yields provide the ultimate proof, though you’ll need a full season to measure this properly. I compare harvests year-on-year in my journal, noting which combinations produced heavier crops or extended picking periods.
Your garden journal becomes essential for tracking these results. I record when to plant each companion pair, weather conditions, soil amendments made, and weekly observations about growth patterns and pest activity. Photographs help tremendously, I take them every fortnight to capture changes I might otherwise miss.
Document the failures too. When my fennel stunted nearby beans, I needed those notes to avoid repeating the mistake. If a pairing shows poor growth, yellowing leaves, or increased pest damage after eight weeks, don’t be stubborn about it. Adjust your approach next season.
The key is systematic observation rather than guesswork. Companion planting works, but it requires you to pay attention and respond to what your garden tells you.
Expert Insights: What the Professionals Recommend
I reached out to Sarah Mitchell, head gardener at RHS Garden Wisley, to get her perspective on companion planting methods that actually work in British conditions. Her advice transformed how I think about pairing plants.
“The biggest mistake I see is gardeners copying combinations from American or Mediterranean sources without considering our climate,” Sarah told me. “In our cooler, wetter summers, you need to prioritize air circulation more than warm-climate gardeners do. That means wider spacing between companions, even when books suggest tight planting.”
She’s particularly keen on using spatial companion planting with aromatic herbs. “French marigolds near tomatoes aren’t just folklore. The scent genuinely confuses whitefly, but only if you brush past them regularly to release the oils. Plant them along paths where you’ll make contact.”
For British vegetable gardens, Sarah recommends temporal planting with our unpredictable springs. “Don’t rush. Let your early broad beans fix nitrogen first, then follow with hungry brassicas in the same spot. Our long, cool growing season actually suits succession planting better than one big simultaneous planting.”
Her most practical tip? “Keep detailed notes about what actually happens, not what should happen. Your garden’s microclimate might make certain pairings thrive or fail differently than mine.”
Since our conversation, I’ve stopped forcing combinations that looked good on paper and started trusting what I observe in my own beds. That shift alone improved my results more than any plant pairing list ever did.
Next Steps and Building on Your Success
Once you’ve mastered the basics, the real fun begins. I found my confidence grew enormously after that first successful season of companion planting, suddenly I was eyeing every bed thinking, “What else could I pair here?”
Start by expanding gradually. Choose one additional bed each season to convert to companion planting rather than overwhelming yourself. I’ve learned this approach lets you observe and refine without creating a management nightmare. As you branch out, keep that garden journal updated with what works in your specific conditions, your notes become more valuable than any generic chart.
Experiment boldly but methodically. Try one new plant combination at a time so you can genuinely assess its impact. I now weave companion planting into my crop rotation plans, thinking three years ahead about which partnerships will follow which beds.
For deeper knowledge, seek out other practical garden tips from experienced organic growers in your region. Local gardening clubs and allotment societies are goldmines for discovering what thrives in your specific microclimate.
Most importantly, share your discoveries. Every garden teaches something unique, and the companion planting community genuinely values your observations.
Common Questions About Companion Planting Methods
I’ve fielded hundreds of questions about companion planting over the years, and the same worries crop up time and again. Here are the answers to what gardeners really want to know when they’re starting out with these methods.
Can I use all three methods together in the same garden?
Absolutely, and I’d actually encourage it. I use spatial companions in my main beds, temporal succession between spring and summer crops, and trap planting around the edges, they complement rather than conflict with each other.
How do I know which plants are truly incompatible?
Start with documented allelopathic relationships (like fennel inhibiting most vegetables) and plants from the same family competing for identical nutrients. Beyond that, trust your observations more than sweeping claims you’ll find online.
Does companion planting work in containers?
It works brilliantly in pots, though you’re limited to spatial companions rather than trap cropping. I’ve had tremendous success with tomatoes and basil in large containers, and lettuce tucked around the base of container roses.
What if my companions aren’t thriving together?
Don’t force it. I’ve had recommended pairings fail in my clay soil that work beautifully for friends with sandy loam. Give combinations one full season, document what happens, then adjust for your specific conditions.
The timeline question deserves a longer answer because it varies dramatically depending on what you’re trying to achieve. Pest diversion from trap crops can work within weeks once plants are established. I’ve watched aphids abandon my kale for nearby nasturtiums in less than a fortnight. Soil improvement benefits from nitrogen-fixing companions take a full growing season to become measurable, though you might notice healthier growth in neighbouring plants by midsummer. The most significant benefits, the ones that transform your whole garden ecosystem, build over two to three years as you refine your combinations and integrate companion planting into your seasonal crop rotation.
What I tell people is this: start with one method and a few proven pairings rather than attempting to redesign your entire garden at once. Your first season is about learning which combinations suit your specific plot, your second season builds on those successes, and by the third year you’ll have developed an intuitive sense of what works in your unique conditions. That’s when companion planting stops feeling like a technique you’re trying and becomes simply how you garden.
I still remember standing in my garden that first summer, clutching a crumpled companion planting chart and wondering if I’d completely botched the whole thing. My tomatoes and basil looked happy enough, but the marigolds I’d wedged between the courgettes seemed thoroughly unimpressed. What I’ve learned since then is that companion planting isn’t about following someone else’s blueprint perfectly, it’s about discovering what works in your specific patch of soil, with your particular mix of sun, shade, pests, and quirks.
The methods I’ve shared here are simply frameworks to give your experiments structure. Some pairings will thrive in your garden while disappointing your neighbour. You’ll stumble onto magical combinations the books never mentioned, and you’ll have spectacular failures that teach you more than any success. That’s the beauty of it.
Start with one method, one bed, perhaps even just three plants this season. Keep notes. Watch how things unfold. Notice which insects show up and which stay away. There’s no deadline, no exam to pass, just you, your plants, and the slow unfolding of understanding that comes from paying attention.
I’d genuinely love to hear how your companion planting journey develops. What combinations have surprised you? Which methods suit your gardening style? Drop me a comment or find me on social media, I’m always eager to learn from fellow gardeners who are out there experimenting, succeeding, and occasionally baffling themselves. Happy planting.