I killed my first basil plant within a week. Overwatered it to death in a too-small pot on a shaded windowsill, wondering why the leaves turned black and slimy. That was 2018, and I genuinely believed I lacked some mysterious green-fingered gene that would forever keep me from growing my own herbs.
What I’ve learned since then, through countless conversations with experienced gardeners and my own trial and error, is that herb gardening for beginners isn’t about having innate talent. It’s about understanding a few fundamental principles and choosing the right herbs to start with. The beauty of herbs is their forgiveness. Most are Mediterranean natives that actually prefer a bit of neglect over fussing.
Most people fail with herbs because they treat them like houseplants. They’re not. They’re survivors that evolved on hillsides with thin soil and irregular rainfall. Understanding that transformed how I approach herb gardening, and it’s why my kitchen windowsill now hosts a thriving collection of basil, mint, and thyme that I clip from daily.
If you’re reading this, you probably want fresh herbs for cooking without spending a fortune on supermarket packets that wilt within days. Maybe you’re drawn to the idea of growing something useful but feel intimidated by gardening guides that assume you know the difference between loam and compost. I understand completely.
This guide strips away the complexity and gives you exactly what you need to start growing herbs successfully in 2026, whether you have a sprawling garden or just a sunny shelf. No jargon, no complicated techniques, just practical steps that work.
Why Herb Gardening Is Perfect for Complete Beginners
I still remember the moment I realised herb gardening was about to change my relationship with growing things entirely. I’d killed a peace lily, watched tomatoes succumb to blight, and given up on courgettes after the slugs won three summers running. Then a friend handed me a small pot of basil from the supermarket and said, “Just water it when the soil feels dry.” That plant not only survived on my kitchen windowsill, it thrived. Within weeks, I was pinching fragrant leaves for pasta, and for the first time in my gardening attempts, I felt like I’d actually succeeded.
That’s the magic of herbs. They’re phenomenally forgiving compared to other plants. Miss a watering? Most herbs tolerate a bit of drought better than drowning. Forget to feed them for a fortnight? They’ll still grow. Plant them in a container that’s less than perfect? They’ll adapt. This resilience makes them the ideal starting point for anyone who’s nervous about keeping plants alive.
The results arrive fast, which matters enormously when you’re building confidence. Basil grows visibly within days. Mint spreads with such enthusiasm you’ll soon be looking for ways to contain it rather than coax it along. You’re not waiting months to see whether you’ve done something right. Within weeks, you’re harvesting, cooking, and reaping the rewards of your effort. That immediate feedback loop keeps you engaged and motivated in a way that, say, waiting for a rosebush to establish simply doesn’t.
Space isn’t a barrier either. I started with three pots on a south-facing windowsill in a rented flat. You don’t need a garden, a greenhouse, or even a balcony. A sunny spot indoors works brilliantly for many herbs, which means herb gardening for beginners is genuinely accessible regardless of your living situation.
Beyond the practical benefits, there’s something genuinely calming about tending herbs. The ritual of checking plants, pinching back growth, and breathing in their scent can improve your sleep and reduce everyday stress. I hadn’t expected that part, but it’s become one of the reasons I keep growing them year after year.
The cost savings are real too. A single basil plant from the supermarket costs around £1 and lasts a few weeks in a pot. A packet of seeds costs the same but yields dozens of plants. Fresh herbs from the shops are expensive and often wilted. Growing your own means you harvest what you need, when you need it, without waste or weekly shopping trips.
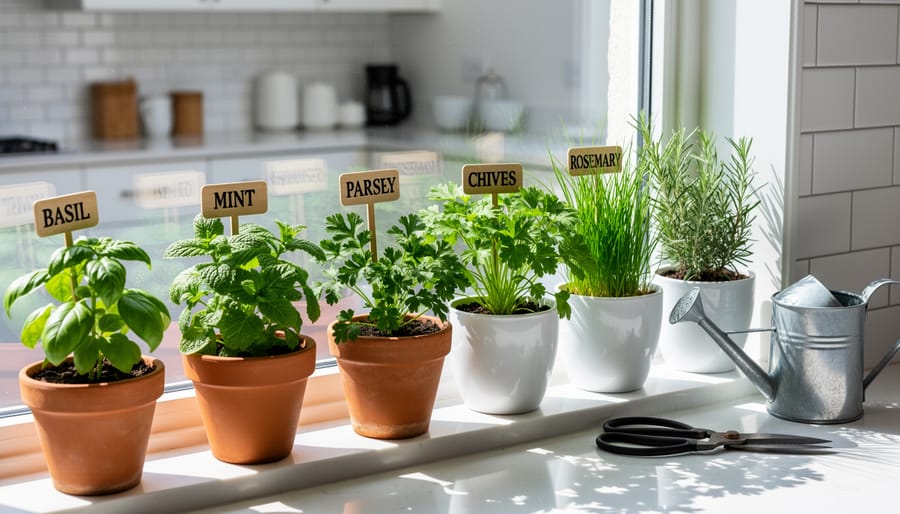
Choosing Your First Herbs: The Foolproof Five
When I planted my first herbs six years ago, I stood in the garden centre utterly paralysed by choice. Rows of fragrant plants beckoned, but I had no idea which ones would forgive my inevitable mistakes. After killing a rosemary plant within three weeks (turns out I drowned it), I learned which herbs truly deserve the “beginner-friendly” label.
These five herbs have earned their place on every beginner’s shortlist because they tolerate erratic watering, survive the UK’s temperamental weather, and bounce back from clumsy pruning attempts. I’ve grown each one successfully, and more importantly, I’ve abused each one and watched them survive.
Mint tops my list because it’s nearly indestructible. This vigorous grower thrives in partial shade, making it perfect for those shady corners that challenge most herbs. My first mint plant survived two weeks of holiday neglect and came back bushier than ever. The catch? Mint spreads aggressively, so always grow it in containers unless you want it colonising your entire garden. I learned this lesson when my spearmint invaded the strawberry patch. For detailed guidance on growing mints successfully, especially managing their enthusiastic growth habits, proper techniques make all the difference.
Basil delivers instant gratification. Within weeks of planting, you’ll have enough leaves for pesto or caprese salad. It craves warmth and sun, so position it in your sunniest spot. Basil does demand consistent moisture, but it communicates clearly: drooping leaves mean “water me now.” I once revived a completely wilted basil plant with a good drink, and it perked up within an hour.
Parsley earns its place through sheer reliability. Both flat-leaf and curly varieties tolerate partial shade and forgive irregular watering better than most herbs. I’ve accidentally left parsley unwatered for days, and it simply paused growing rather than dying dramatically. It’s slower to establish than basil but outlasts it, often surviving mild UK winters outdoors.
Chives practically grow themselves. These onion-flavoured stalks return year after year, require minimal attention, and produce gorgeous purple flowers that bees adore. My chives survived being completely forgotten in a corner of the garden for an entire summer. When I rediscovered them, they were thriving despite zero care.
Thyme completes the collection as the most drought-tolerant option. This Mediterranean native actually prefers neglect over fussing. Overwatering kills thyme faster than anything else, making it ideal for forgetful beginners. My thyme plant weathered last year’s summer heatwave without supplemental watering and emerged even more fragrant.
Here’s how these five compare at a glance:
| Herb | Sunlight Needs | Water Requirements | Best Uses | Why Beginner-Friendly |
|---|---|---|---|---|
| Mint | Partial shade to full sun | Keep moist | Teas, cocktails, salads | Nearly impossible to kill, vigorous grower |
| Basil | Full sun (6+ hours) | Regular watering | Pesto, pasta, tomato dishes | Fast results, clear communication when thirsty |
| Parsley | Partial shade to sun | Moderate, tolerates drying | Garnish, tabbouleh, sauces | Extremely forgiving, adaptable to conditions |
| Chives | Full sun to partial shade | Moderate | Baked potatoes, eggs, soups | Perennial, virtually indestructible, no fuss |
| Thyme | Full sun | Low, prefers dryness | Roasted vegetables, meats, stews | Thrives on neglect, drought-tolerant |
Start with three of these five based on your cooking preferences and available sunlight. You don’t need all five immediately. I began with mint and basil, added parsley the following month, then gradually expanded my collection as my confidence grew. Each success builds the knowledge and intuition that transforms you from nervous beginner to capable herb gardener.
Essential Supplies: What You Actually Need (And What You Don’t)
I’ll be honest: my first herb garden lived in a cracked mixing bowl I’d retired from the kitchen and a couple of yoghurt pots with drainage holes punched through the bottom. They worked brilliantly, and I still use those yoghurt pots five years later.
You don’t need much to start container gardening with herbs, which is precisely why it’s perfect for beginners. Here’s what actually matters.
For containers, anything with drainage holes works. Terracotta pots from the pound shop, plastic nursery pots, old colanders, even wooden crates lined with landscape fabric. I’ve seen stunning herb gardens in recycled paint tins. Size matters more than looks: aim for at least 15cm depth for most herbs, though mint and parsley prefer 20cm. Multiple small pots often work better than one large planter, especially when you’re learning different watering needs.
Soil is where you shouldn’t skimp. Pick up multipurpose compost from any garden centre, Wilko, or B&Q. A 50-litre bag costs around six quid and will fill several pots. Avoid garden soil in containers as it compacts terribly. I learned this the hard way when my first basil plants sat in what became essentially clay.
Drainage is non-negotiable. If your recycled container lacks holes, drill or punch some. Layer broken crockery or gravel in the bottom if you like, though honestly, holes alone do the job.
Tools? A hand trowel for filling pots and a small pair of scissors for harvesting. That’s it. I bought an expensive pruner set my first year and it’s still in the drawer while I reach for kitchen scissors.
For watering, any jug or bottle works, though a small watering can with a rose makes life easier. The plastic ones at Wilko cost about four pounds.
Skip the fancy plant food initially. Decent compost feeds herbs for weeks. When you do need fertilizer, a basic liquid tomato feed diluted to half strength works perfectly.
The myth that you need matching pots, special herb compost, and dedicated tools keeps people from starting. You genuinely need containers, drainage, basic compost, something to dig with, and something to cut with. Everything else is nice but optional.
Where to Grow: Finding the Right Spot
Finding the right spot for your herbs doesn’t require a sprawling garden or perfect conditions. I learned this the hard way during my first spring, lugging pots between my north-facing kitchen windowsill, a shaded corner of the patio, and finally onto a sunny balcony railing where my basil stopped looking sulky and actually grew.
The truth is, most herbs need around six hours of sunlight daily to thrive. South-facing windowsills are brilliant for this in UK homes, though east or west-facing spots work well too, especially for parsley and mint, which tolerate partial shade. If you’ve only got north-facing windows, don’t despair. Mint and chives will still grow there, just more slowly.
Balconies and patios offer more flexibility. You can group pots together near a sunny wall, which creates a microclimate and makes watering easier. I keep my Mediterranean herbs like thyme and basil in the sunniest spot, while parsley sits slightly back where it catches morning sun but afternoon shade.
Garden beds are wonderful if you have them, but remember that herbs in the ground are harder to move when our unpredictable British weather turns. Last June, I watched my outdoor basil sulk through a fortnight of grey skies and rain, while my potted basil on the covered patio kept producing.
The key is observability. Start your herbs somewhere you’ll see them daily, whether that’s by the kitchen sink or near your back door. You’ll notice when they need water, when they’re stretching toward light, or when they’re ready for harvesting. My best growing spot turned out to be the one I walked past every morning with my tea.
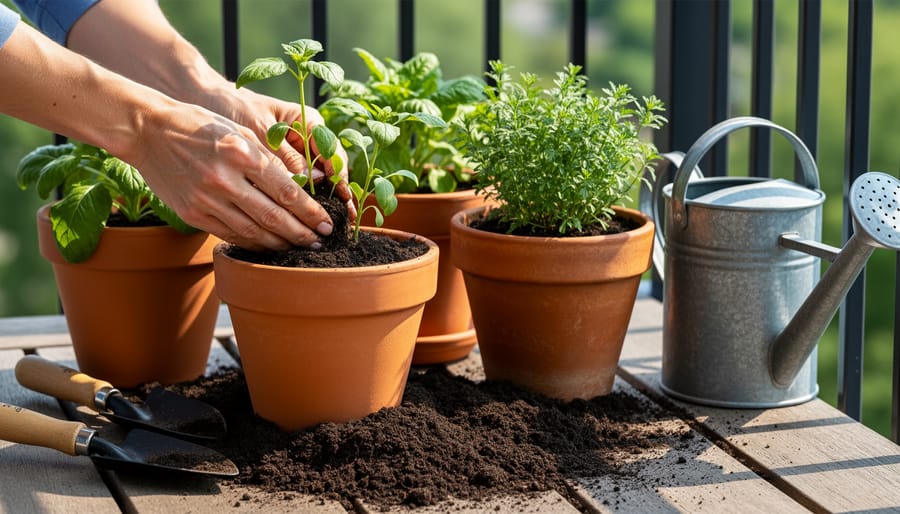
Planting Your Herbs: A Step-by-Step Walkthrough
The beauty of workshops like the one at Bialas Farms on May 9, 2026, is watching someone demonstrate each step while you follow along. But you can absolutely replicate that experience in your own kitchen or garden this weekend. I still remember the first time I transplanted a pot of basil, convinced I’d kill it within minutes. Spoiler: it thrived, and I learned the process is far more forgiving than I’d imagined.
Starting with nursery plants rather than seeds removes most of the anxiety. You’re working with established herbs that already have a root system and visible growth. The steps are genuinely straightforward, and once you’ve done it once, you’ll wonder why you waited so long.
- Prepare your container by ensuring drainage holes exist at the bottom. If using a recycled pot without holes, carefully drill or punch three to five small openings to prevent waterlogging.
- Fill the container about two-thirds full with good quality multipurpose compost. Don’t compress it. Leave it loose and aerated so roots can spread easily.
- Water the nursery plant thoroughly while it’s still in its original pot. This helps the root ball slide out intact and reduces transplant shock.
- Gently squeeze the sides of the nursery pot and tip the plant into your palm, supporting the stem base with your fingers. If roots have circled the bottom, gently tease them apart with your fingertips to encourage outward growth.
- Place the herb in your prepared container at the same depth it was growing previously. The soil line should match its original level, neither deeper nor shallower.
- Fill around the root ball with more compost, pressing lightly to eliminate air pockets but keeping the soil texture open and fluffy.
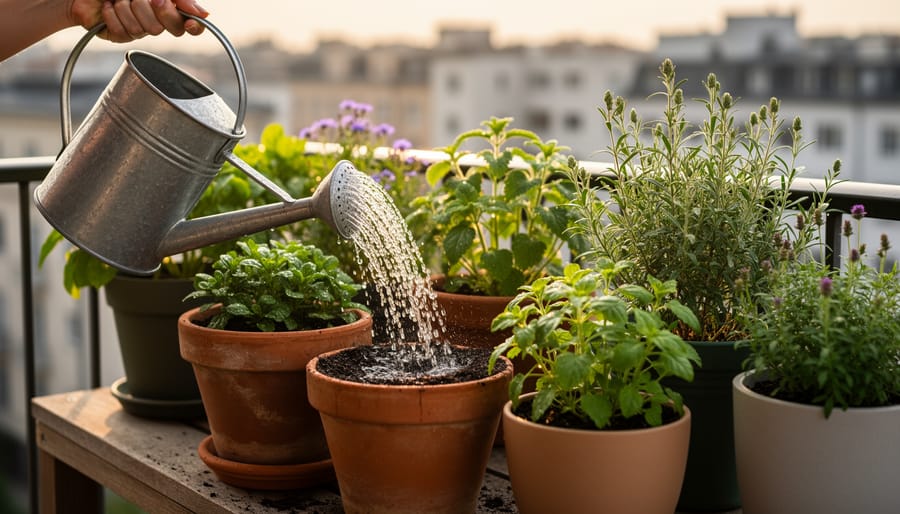
- Water thoroughly until liquid drains from the bottom holes. This settles the compost around roots and gives your herb a proper start in its new home.
If you’re planting multiple herbs in one larger container, give them breathing room. Mint and basil need at least 15 centimeters between plants, while thyme and chives can sit slightly closer. Overcrowding invites disease and weak growth, something I learned after stuffing five herbs into a window box that could comfortably hold three.
The hands-on instruction offered in workshops provides immediate feedback when you’re unsure if you’re pressing too hard or watering enough. At home, trust your instincts. Plants are remarkably resilient. That first watering might feel excessive as it pours through the drainage holes, but you’re doing it right. The goal is saturating the entire root zone, not just dampening the surface.
Daily Care: The Simple Routine That Keeps Herbs Thriving
I’ll be honest: I nearly killed my first basil plant by loving it to death with a watering can. Every morning, I’d give it a generous drink because I thought more water equalled more growth. Within two weeks, the leaves turned yellow and the stems went mushy at the base. Classic overwatering, and it taught me the single most important lesson about herb care: less is genuinely more.
Watering causes more beginner casualties than anything else. The trick is checking the soil before you water, not watering on a fixed schedule. Push your finger about two centimetres into the compost. If it feels dry at that depth, water thoroughly until it drains from the bottom. If it still feels damp, leave it alone. Most herbs prefer slightly dry conditions to soggy roots. During a British heatwave, you’ll need to water in extreme heat more frequently, sometimes twice daily for containers, but the finger test still rules.
Feeding is wonderfully straightforward. I use a liquid seaweed feed diluted to half strength every two to three weeks during the growing season (April through September). That’s it. Herbs aren’t hungry plants, and overfeeding makes them produce lush leaves with weak flavour.
Pruning terrified me at first, but it’s actually the secret to bushier, more productive plants. Pinch out the growing tips regularly, taking the top few centimetres of stem just above a leaf pair. This forces the plant to branch sideways rather than shooting upwards. I harvest as I prune, using what I snip in that evening’s cooking.
For pests, I’ve found that healthy herbs in the right conditions rarely suffer serious problems. The occasional aphid cluster gets blasted off with a spray of water. Yellowing leaves usually signal watering issues rather than disease. Trust your observations more than a rigid routine, and your herbs will thrive.
Learning from the Experts: Workshops and Community Resources
When I first started herb gardening, I thought I could figure it all out from YouTube videos. I was wrong. There’s something irreplaceable about having an experienced gardener stand beside you, correcting your watering technique or showing you exactly how deep to plant. This hands-on guidance transforms confusion into confidence remarkably fast.
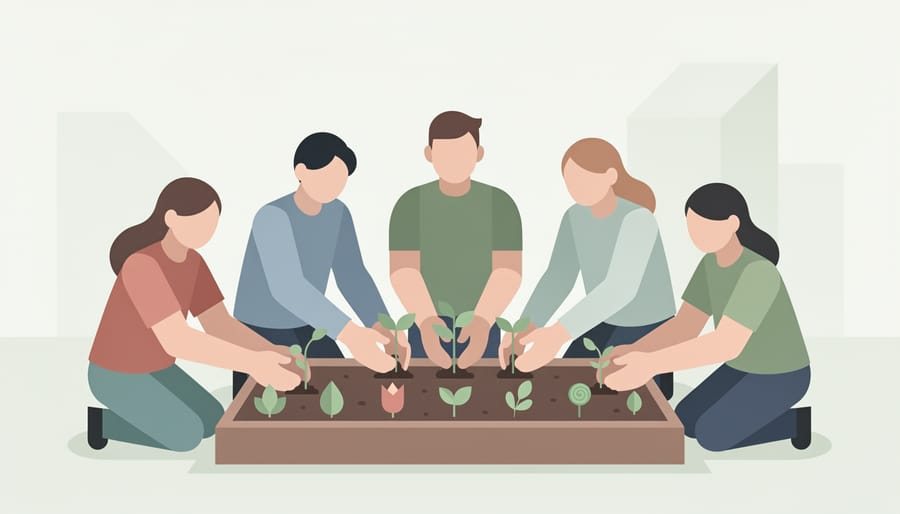
That’s why I’m thrilled to see workshops flourishing across the UK and beyond in 2026. The Herb Planting Workshop at Bialas Farms on Saturday, May 9, offers three sessions with everything you need provided, plus personal instruction from The FarmGirl. You can bring friends or well-behaved kids to create a planter together. The Ridgetown Horticultural Society is running Herb Gardening 101, whilst the Growing at Home Series includes hands-on herb gardening sessions specifically designed for beginners.
The most common thing beginners say after workshops is “I didn’t realize it was this straightforward.” Seeing it done once removes years of hesitation.
What makes these workshops invaluable isn’t just learning the techniques. It’s the immediate feedback when you’re doing something wrong, the chance to ask your specific questions, and the camaraderie of fellow beginners who share your uncertainties. You leave with a planted container, new knowledge, and crucially, the confidence that you can do this at home.
I’d encourage you to search for your local horticultural society. These community groups often run affordable sessions and provide ongoing support as your garden develops. Many organize plant swaps and seasonal advice evenings. The connections you make often prove as valuable as the herbs themselves. Starting alone is fine, but starting with a community behind you makes the journey considerably more enjoyable.
Common Beginner Mistakes (And How I Recovered from Them)
I killed my first basil plant within two weeks, and I’m fairly certain I traumatised a pot of mint so badly it never quite recovered its spirit. If you’re worried about making mistakes with your herbs, let me assure you: you will, and that’s absolutely fine. I’ve made nearly every beginner blunder in the book, and my garden is still thriving.
Overwatering was my signature move. I’d fuss over my herbs like an anxious parent, checking them twice daily and adding “just a little more” water each time. The result? Sad, yellowing basil with soggy roots and a distinctly mouldy smell. I learned the hard way that most herbs prefer a drink when the top inch of soil feels dry, not a constant paddle. Now I stick my finger in the soil before reaching for the watering can, which sounds ridiculously simple but genuinely changed everything.
I also chose terrible containers initially. My first mint lived in a decorative pot with no drainage holes because it looked prettier than the plastic nursery pots. Within days, the poor thing was sitting in a soup of stagnant water. After drilling drainage holes in the bottom (and accepting that function beats aesthetics), the mint staged a remarkable comeback. These days, I check for drainage before I check for style.
Then there was my sun situation. I plonked my shade-loving parsley on the sunniest windowsill in the house, where it promptly crisp-fried in the afternoon heat. Meanwhile, my sun-worshipping basil languished in a dim corner, producing spindly, pale stems. After a week of musical herbs, moving pots around until everyone looked happy, I finally cracked the code.
The mistake that still makes me laugh? Forgetting to harvest. I’d planted herbs to use them, yet I was so proud of my little garden that I couldn’t bear to cut anything. They grew leggy and bitter whilst I admired them from afar. Once I started snipping regularly, they bushier and more productive. Turns out herbs actually want to be harvested.
Your First Harvest: When and How to Pick
I’ll never forget standing in my kitchen on a rainy Tuesday evening, scissors in hand, staring at my basil plant and thinking, “Is it actually time?” That moment of hesitation is so common among new herb gardeners, we’re terrified of cutting too much or doing it wrong. But here’s the wonderful truth: harvesting herbs is nearly impossible to mess up, and it actually makes your plants stronger.
Most herbs are ready for their first harvest once they’ve got at least six to eight inches of healthy growth. Don’t wait for some perfect moment, the best time is when you need them. I started by snipping just a few leaves for a pasta sauce, and the plant responded by growing even bushier. That’s the magic: proper harvesting encourages more growth, not less.
The technique is simple. Use clean scissors or pinch with your fingers just above a pair of leaves, never taking more than one-third of the plant at once. For basil, pinch out the top growth before it flowers. For parsley and mint, cut outer stems first. Chives can be snipped near the base. Always leave enough foliage for the plant to keep photosynthesizing.
That first meal with my own herbs, a simple tomato and basil salad, tasted completely different. Not because the flavor was wildly superior (though it was fresher), but because I’d grown it. There’s genuine pride in that moment, and it transforms cooking from a chore into something creative and connected. Start harvesting this week. Your herbs are tougher than you think.
You’ve reached the end of this guide, and I hope you’re feeling genuinely excited rather than overwhelmed. Here’s the truth I’ve learned through years of growing herbs: this really is accessible to complete beginners. You don’t need a garden, a green thumb, or even much time. You just need a pot, some compost, and the willingness to start.
This weekend, I encourage you to take that first small step. Buy one herb plant from your local garden centre. Nestle it into a container with decent drainage. Water it gently. Place it where it will catch some light. That’s it. You’ve become an herb gardener.
The benefits extend far beyond the kitchen, though cooking with fresh basil you’ve grown yourself is genuinely magical. I’ve found that tending herbs grounds me, pulls me into the present moment, and connects me to something quietly life-affirming. My mental health improved when I started this practice. My grocery bills decreased. My cooking became more adventurous. These are real, tangible changes that began with a single pot of mint.
You will make mistakes along the way. We all do. You’ll overwater something, forget to harvest, accidentally let aphids establish a colony. It’s completely normal, and your herbs are far more forgiving than you imagine.
I’d love to hear how your herb gardening journey unfolds. What are you growing first? What questions are nagging at you? Share your experiences, your triumphs, and your failures in the comments below. This community thrives when we learn from each other.
Your kitchen garden awaits. Start it this weekend.