I first grew pea microgreens on my kitchen windowsill three winters ago when the garden was too waterlogged for proper seasonal planting and I’ve been hooked ever since. These tender shoots deliver a sweet, fresh pea flavour in just 10 to 14 days from sowing to scissors, making them one of the fastest, most forgiving crops for anyone curious about growing their own food indoors year-round.
Unlike sprouting seeds in a jar or waiting months for outdoor vegetables, pea microgreens strike a perfect middle ground. You need nothing more than a shallow tray, some compost, seeds sold specifically for microgreens, and a spot with decent light. No grow lights, no fancy equipment, no green fingers required.
The process is straightforward. Soak the peas overnight to kickstart germination, scatter them densely over moist compost, cover them for a few days while they sprout, then uncover and watch them race upwards. Within two weeks, you’ll have vibrant green shoots ready to snip straight into salads, sandwiches, or stir-fries. They taste like spring in a handful.
I learned most of my early mistakes from my neighbour, Martin, a retired chef who grows trays of microgreens on rotation in his conservatory. He warned me about mould, overwatering, and buying the wrong seeds, all pitfalls that can trip up beginners. His advice has saved me countless soggy failures, and I’ll share those lessons here so you can get it right first time.
If you’ve been thinking about microgreens but don’t know where to start, pea shoots are your gateway crop. They’re nearly impossible to mess up and genuinely delicious.
Why I Fell in Love with Pea Microgreens (and Why You Will Too)
I’ll be honest: I didn’t expect a handful of seeds in a plastic tray to become one of my favourite parts of gardening. But that’s exactly what happened the first time I grew pea microgreens. I’d started them on a whim one grey January afternoon, more as an experiment than anything else, and within a week I had a tray of vibrant green shoots that tasted like spring itself.
The speed is genuinely remarkable. While my outdoor peas were still months away and my mint was barely stirring from winter dormancy, these little beauties went from dry seed to harvest-ready in just 7 to 10 days. That’s faster than most vegetables can even germinate. It’s the gardening equivalent of instant gratification, and after years of patiently waiting for tomatoes and squash, I found that pace absolutely thrilling.
The flavour won me over completely. These aren’t just pretty garnishes. They’re sweet, crunchy, and unmistakably pea-like, but somehow fresher and more delicate than mature pea shoots. I started adding them to everything: sandwiches, salads, scrambled eggs, even as a bed under pan-seared fish. The first time I served them to friends at a dinner party, scattered over a simple pasta dish, someone actually asked where I’d bought them. When I said I’d grown them on my kitchen counter in eight days, the room went quiet. Then came the questions.
What really sealed the deal was realizing I could grow them year-round, indoors, with minimal fuss. No digging, no weeding, no worrying about frost or slugs. They slot beautifully into a rhythm with slower crops: while I’m nurturing pea shoots for a few weeks or waiting for mint cuttings to establish, I can turn out batch after batch of microgreens. They’ve become my edible insurance policy against the gardening doldrums.
What You’ll Need to Get Started
Good news: you don’t need much to grow pea microgreens, and most of what you do need is probably already in your kitchen or garden shed. I started my first batch with a takeaway container, some compost, and a packet of dried peas from the wholefood shop. It worked brilliantly, which tells you everything about how forgiving this crop is.
Here’s what I recommend gathering before you start:
- Pea seeds: Look for untreated, food-safe seeds sold specifically for sprouting or microgreens. I’ve had great results with varieties like Green Pea and Speckled Pea.
- Growing tray or shallow container: Anything 5-8cm deep works. I use standard 10×20 seed trays (widely available at garden centres), but recycled plastic salad boxes are perfect too.
- Growing medium: Either multipurpose peat-free compost or a soilless mix like coconut coir. Both work well; I prefer coir for indoor growing because it’s cleaner.
- Spray bottle or small watering can: Essential for gentle watering without disturbing seeds or young shoots.
- Weight for blackout: A second tray, a flat board, or even a few books wrapped in a plastic bag. You’ll need this to press down on the seeds during their first few days.
- Grow lights (optional): Not strictly necessary if you have a bright windowsill, but they give more consistent results in winter. I use a simple LED strip light on a timer.
For seeds, I usually order from UK suppliers like The Seed Sprouting Company or Happy Kombucha, though many health food shops stock organic pea seeds that work just as well. The crucial thing is avoiding garden pea seeds, which are often treated with fungicides. You’ll want about 50-75g of seeds per standard tray, though it’s worth buying a larger bag if you plan to grow successive batches.
The beauty of this setup is that once you’ve got your trays and spray bottle, the only ongoing cost is seeds and growing medium. Most of my kit has lasted years, and I’ve probably spent less than £30 total to grow hundreds of trays. Not bad for fresh greens year-round.
Before You Begin: Safety and Success Tips
Before you sow your first pea seed, there are a few critical safety points and practical considerations that will save you frustration, and potentially protect your health. I learned some of these lessons the slightly embarrassing way, so let me spare you the same mistakes.
First and most importantly: you absolutely must use untreated, food-grade pea seeds specifically sold for microgreens or sprouting. Garden pea seeds from the shed or garden centre are often treated with fungicides or other chemicals designed to protect them in soil, but these treatments make them unsafe to eat as microgreens. I once made the rookie error of using leftover garden peas from a packet tucked away in my potting bench, and whilst they germinated beautifully, I felt decidedly uneasy about eating them once I spotted the pink coating on the seeds. Bin them and start fresh with proper microgreen seeds from a reputable UK supplier.
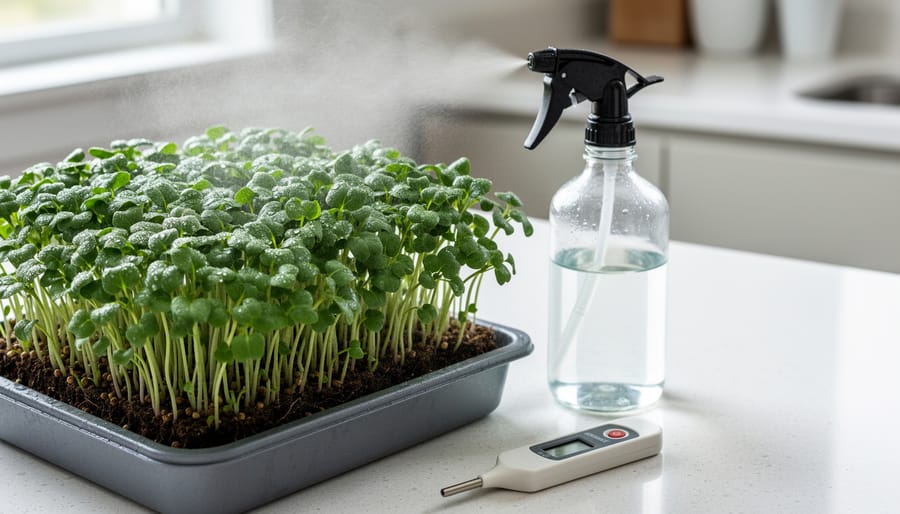
Mould is your other main enemy, and it thrives in the exact conditions pea microgreens love: warmth and moisture. The key to avoiding it is proper ventilation and restrained watering. I chatted with Emma Richardson, who runs a small microgreens business in Sussex, and she told me: “Most beginners drown their trays. You want the medium moist, not sodden, if you can squeeze water out of it, you’ve gone too far.” Keep air moving around your trays, don’t seal them in plastic after the blackout period, and water from below or use a fine mist rather than pouring water directly onto the greens.
When applying weight during the blackout period, be sensible about what you use. A small tray or board with a bag of flour on top works perfectly, but don’t pile on something so heavy it cracks your container or compresses the seeds into a dense mat. I’ve seen someone use a cast-iron skillet, which was overkill and damaged their tray.
Finally, manage your expectations based on your environment. If you’re growing on a cold windowsill in January, your microgreens will take closer to 12 days than 7. Conversely, in a warm kitchen in summer with good light, they’ll rocket along. Neither is wrong, just adjust your timeline and enjoy the process.
Growing Pea Microgreens: Step-by-Step
Soaking Your Seeds
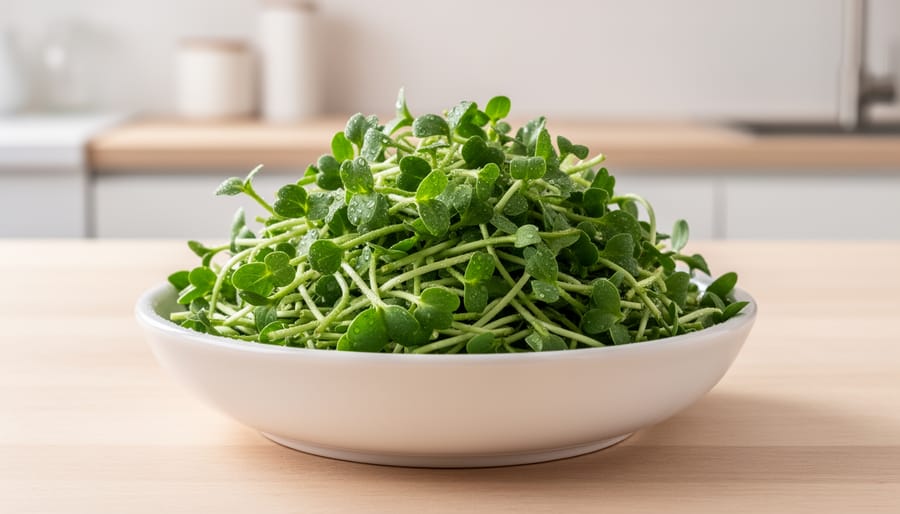
I still remember the first time I skipped the soaking step, thinking it couldn’t make that much difference. The germination was patchy, and I learned my lesson quickly. Pre-soaking pea seeds for 8-12 hours gives them a crucial head start, softening the tough seed coat and jumpstarting the sprouting process.
Here’s my routine: I measure out the seeds I need (around 30-50 grams for a standard 10×20 tray), rinse them in a colander, then tip them into a clean bowl or jar. I cover them with cool tap water, about twice the volume of the seeds, and leave them on the kitchen counter. I usually soak mine overnight, starting around 8pm and draining them by 8am the next morning.
You’ll know they’re ready when the seeds have visibly plumped up and the water looks slightly cloudy. Some seeds might even show tiny white shoots poking through, which is perfectly fine. After soaking, drain them thoroughly and give them another quick rinse. They should feel swollen and slightly softer to the touch.
One tip: don’t soak longer than 12 hours or the seeds can start to ferment, especially in warm weather. Set a reminder on your phone if you tend to forget things overnight like I do.
Preparing Your Growing Tray
I learned the hard way that skipping proper tray prep leads to patchy growth and frustrating bare spots. Your pea microgreens deserve a solid foundation, and getting this right takes just a few minutes.
Start with a clean growing tray, mine are standard 10×20-inch seed trays, about 2 inches deep. Fill with your chosen growing medium to roughly 1-1.5 inches depth. I prefer a quality seed compost or coco coir, both readily available at UK garden centres. The medium should be moist but not soggy; I aim for the consistency of a wrung-out sponge. Too wet and you’re inviting mould, too dry and your seeds struggle to germinate.
Here’s where many beginners stumble: level that surface carefully. Use your hand or a small piece of cardboard to gently press and smooth the medium flat. Uneven surfaces create puddles when you water and lead to inconsistent growth heights. I’ve had trays where half the greens were harvest-ready whilst the other half lagged behind, all because I rushed this step.
Press down lightly to firm the surface without compacting it. Your soaked seeds need good contact with moisture, but their roots also need some air. That balance comes from this gentle, even preparation.
Sowing and the Blackout Period
I’ll never forget the first time I properly understood the blackout period, watching those pale, determined shoots push upward in complete darkness felt like witnessing pure plant magic. This phase is absolutely critical for strong, flavourful microgreens.
Once your tray is ready, scatter your soaked pea seeds evenly across the surface. You want them close but not piled on top of each other, imagine a crowded pub car park rather than a motorway pile-up. I aim for seeds just touching, which means roughly 2-3 ounces of dry seeds per standard 10×20 inch tray. Press them gently into the growing medium with your hand so they make good contact with the moisture below.
Here’s the crucial bit: cover your seeds with another tray turned upside down, then place a light weight on top. I use a brick wrapped in cling film, but a bag of rice or a couple of tins work brilliantly. This gentle pressure encourages the seeds to push downward with their roots and upward with their shoots, creating those lovely thick, crunchy stems we’re after.
Keep everything in complete darkness for three to four days. During this time, the seeds are germinating and the shoots are stretching upward, searching for light. Check once daily, lift the weight and cover briefly to mist if things look dry, but otherwise leave them be. When you peek on day three or four, you’ll see a tangled forest of pale yellow shoots, usually two to three inches tall. That’s your cue to bring them into the light.
Introducing Light and Daily Care
After three to four days under their cosy blackout setup, your pea seeds will have transformed into pale, reaching shoots, and that’s your cue to introduce them to light. I usually check mine on day four, gently lifting the weight and cover. If the shoots are about two inches tall with their characteristic arched stems, they’re ready. Don’t panic if they look a bit yellowish and spindly at this stage, that’s completely normal.
Remove the weight and cover, then place your tray in bright, indirect light. A south-facing windowsill works brilliantly during spring and summer, though I’ve found that winter growth benefits enormously from a simple LED grow light positioned about 12 inches above the tray. Within hours, you’ll notice the shoots begin to green up, it’s genuinely magical to watch.
From this point, your daily routine is wonderfully simple. I check my trays each morning and evening, looking for two things: moisture level and growth progress. The growing medium should stay consistently damp but never waterlogged. I’ve learned to water from below by pouring water into the tray rather than spraying from above, which helps prevent mould and keeps those delicate shoots from getting battered. If the medium feels dry when I press it gently, I add about half a cup of water and let it soak up from the bottom.
Watch them shoot upward over the next few days. By day seven or eight, you’ll have a lush green carpet of microgreens standing proud and ready for your kitchen scissors.
Knowing When to Harvest (and How to Tell They’re Ready)
I remember the first time I grew pea microgreens, I checked them obsessively every few hours on day seven, convinced I’d somehow miss the perfect moment. The truth is, pea microgreens give you a generous window to harvest, and once you know what to look for, you’ll spot readiness at a glance.
Your microgreens are ready when they reach about 5-8cm tall and have developed their first set of true leaves (the second set of leaves that appear after the initial seed leaves). This typically happens around day 7-10, depending on temperature and light. Look for vibrant green colour throughout the stems and leaves, they should stand upright and appear crisp, not floppy or pale. The telltale sign I always watch for is when those true leaves have fully unfurled and the whole tray looks lush and uniform.
Before you cut anything, do what I call the taste test: snip a single shoot and sample it. Pea microgreens should taste sweet and unmistakably pea-like, with tender stems that snap cleanly rather than bend or feel tough. If they taste bitter or the stems are woody, you’ve waited a touch too long.
To harvest, grab a sharp pair of kitchen scissors and cut the stems just above the growing medium, working your way systematically across the tray. I like to hold a small handful gently as I cut to keep everything tidy. Don’t pull or tug, you want clean cuts that leave the roots and medium undisturbed.
If something looks off, here’s how to diagnose it. Leggy, pale stems that flop over usually mean insufficient light, they’re still edible but less flavourful. Yellowing leaves suggest overwatering or poor air circulation; harvest what looks healthy and compost the rest. If you spot any fuzzy white or grey patches, that’s mould, not root hairs (which are fine and wispy). Bin mouldy trays immediately and adjust your watering and ventilation for the next batch.
What to Do After Your First Harvest
After you’ve snipped your first gorgeous batch of pea microgreens, you’ll probably be tempted to water the tray and wait for a second harvest. I tried this once, and honestly, save yourself the disappointment. Unlike some microgreens that can regrow, pea shoots at this young stage rarely produce a worthwhile second flush. The plants put everything into that initial growth spurt, and what comes back (if anything) tends to be sparse and leggy.
Instead, I tip the spent growing medium and roots straight into my compost bin. It breaks down beautifully and feeds future garden projects. Then I start a fresh tray immediately. This is the secret to continuous harvests: sow a new batch every three to four days, and you’ll have fresh microgreens rolling in week after week without any gaps.
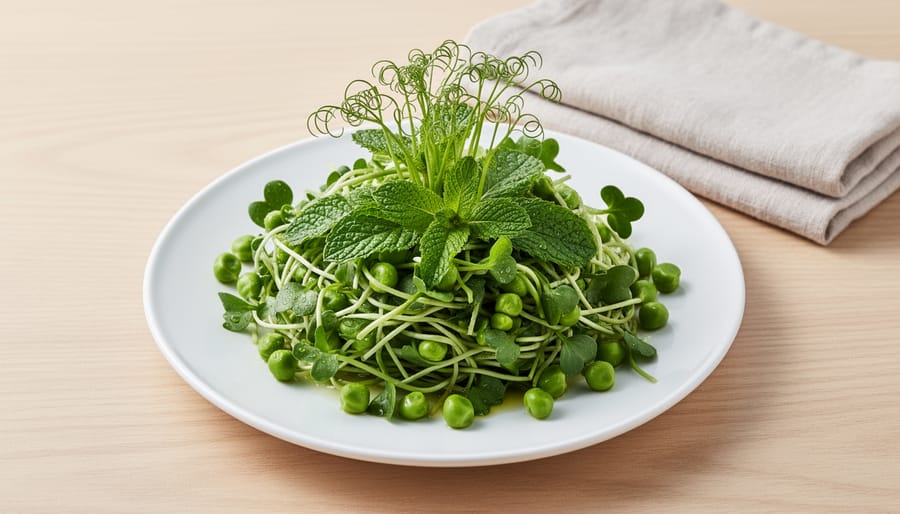
Now for the fun part. I’ve found pea microgreens pair brilliantly with other quick crops I’m growing simultaneously. A handful tossed with just-picked pea shoots and torn fresh mint makes the simplest spring salad sing. Try them layered in sandwiches, scattered over soups, or folded into scrambled eggs. The sweet, crisp flavour complements so many dishes, and growing them alongside other edibles teaches you valuable lessons about timing and companion planting that translate beautifully to your outdoor beds.
Start your next tray today. You’ll thank yourself in ten days.
Common Questions About Growing Pea Microgreens
I get asked a lot of questions about growing pea microgreens, especially from folks trying them for the first time. Here are the answers to the ones that come up most often, straight from my own experience and plenty of trial and error.
Can I reuse the soil after harvesting?
I don’t recommend it. The dense root mat from pea microgreens depletes nutrients quickly and can harbour mould spores. I compost the spent growing medium along with the roots, it’s brilliant for the compost bin, and start fresh each time.
Do I need grow lights to succeed?
Not necessarily. A bright windowsill works perfectly well in spring and summer, though growth may take a day or two longer. In winter, when UK daylight is scarce, a basic LED grow light makes a noticeable difference and keeps your greens from getting leggy.
What should I do if they get mouldy?
Prevention is easier than cure. Make sure you’re not overwatering and that air can circulate around your tray. If you spot white fuzz on the growing medium (not on roots, that’s just root hairs), increase airflow, reduce moisture, and harvest what’s salvageable. Next time, water less frequently.
How long do harvested microgreens last?
In a sealed container in the fridge, I get 5-7 days before they start losing their crunch. Rinse and dry them gently after cutting, and don’t wash them until you’re ready to use them, excess moisture shortens their life considerably.
Can I grow pea microgreens outdoors?
You can during warmer months, but I find indoor growing gives you far better control. Outdoors, you’re dealing with unpredictable weather, slugs, and birds who find young pea shoots irresistible. If you want outdoor peas, I’d suggest full-sized pea shoots instead or plant yarrow nearby as a companion to support your broader garden.
One question I hear less often but wish I’d known earlier: “Should I worry about the papery seed hulls?” Honestly, no. Those little caps fall off naturally as the plants grow, and any that remain are completely harmless to eat. I used to fuss over removing them, but now I just leave them be and focus on enjoying the harvest.
And there you have it, from dry seed to vibrant green harvest in just 10 days. I honestly can’t think of another crop that delivers such quick satisfaction with so little fuss. Even when my outdoor garden’s battling slugs or waiting weeks for carrots to size up, these little pea microgreens never fail to reward me.
If you’ve been sitting on the fence about starting, now’s the time. Grab a packet of untreated pea seeds, find a spot by your kitchen window, and sow your first tray this weekend. You’ll be snipping fresh greens before the week’s out, and I’d love to hear how it goes for you. Drop a comment below with your questions, your successes, or even your “what went wrong” stories, that’s how we all learn, through a proper chat over the fence.
What I’ve found most rewarding is how beautifully pea microgreens slot into the rhythm of a broader edible garden. While you’re waiting for outdoor pea shoots to climb their supports or for mint to fill out its pot, you can keep harvesting these quick crops indoors all year round. They’re the perfect gateway to growing more of your own food, one small tray at a time.
Happy growing, and here’s to fresh greens on your plate before the fortnight’s out.